


Corte steel edging can be bent to 90 degrees, but the best method depends on its thickness, height, length, and intended use. Thinner edging strips can be bent using solid wooden blocks, clamps, and gradual pressure. Thicker, more rigid edging strips are more difficult to bend precisely and may require specialized metal-forming equipment, carefully designed relief cuts, or pre-formed corners.
Consult the manufacturer’s recommendations before beginning the process. Forcing weathering steel into a sharp bend without proper support may cause it to crack or develop uneven kinks.
.png)
Consult the manufacturer’s recommendations before beginning the process. Forcing weathering steel into a sharp bend without proper support may cause it to crack or develop uneven kinks.
1. Quick Answer
Can Weathering Steel Edging Be Bent to a 90-Degree Angle
Yes, Corten garden edging can be bent to a sharp 90-degree angle. However, because weathering steel (atmospheric weathering steel conforming to ASTM A588 or ASTM A606-4 standards) has a higher tensile strength (485 to 620 MPa) than standard carbon steel, the specific bending method used depends directly on the thickness of the sheet.
Best Methods for Thin Edge Strips
For thin landscape edging (1.0 mm to 2.0 mm / 18-gauge to 14-gauge), use the “shim and support” or “clamp and bend” methods. Secure the steel to a sturdy wooden block and apply even manual leverage with a rubber mallet to form a clean, tight bend without compromising the structural integrity of the steel.
Best Methods for Thick Edging
For medium- to thick Corten edging (2.5 mm to 3.0 mm or thicker / No. 11 and thicker), manual bending along the bending radius often causes the steel to arch or crack. The most effective method is the scoring and bending technique: use an angle grinder to score a shallow line on the back (inner) side, then gently bend the steel along that score line.
When to Use Preformed Corner Fittings
For heavy-duty structural borders (4.0 mm to 6.0 mm), commercial landscaping, or projects requiring extensive repetitive installation, skip the manual bending process and use factory-preformed 90-degree corner fittings instead. Preformed corner fittings ensure precise geometric alignment, offer higher load-bearing capacity, and eliminate the risk of on-site stress cracking.
2. Understand the Material
Typical Thicknesses for Corten Steel Edging
► 1.0 mm to 1.5 mm (18 to 16 gauge): Suitable for light-duty residential lawn edging; offers excellent flexibility, making it ideal for curved designs, and can be easily bent by hand.
► 2.0 mm to 2.5 mm (14 to 12 gauge): The standard choice for professional landscaping; striking a balance between structural rigidity and workability.
► 3.0 mm to 6.0 mm (11 gauge to 1/4 inch): Heavy-duty commercial edging, stepped retaining walls, and driveway borders; extremely rigid, making cold bending difficult without specialized mechanical scoring or slotting.
How Thickness Affects Bendability
As steel thickness increases, the force required to yield the outer metal fibers increases exponentially. Bending 1.5-millimeter-thick steel requires only moderate leverage applied at a small bending radius. In contrast, hand-bending 3.0-millimeter weathering steel that has not been scored requires immense mechanical force and often results in a wide arc rather than a sharp 90° right angle.
Flexible vs. Rigid Edge Treatment
Flexible weathering steel borders can bend smoothly along broad landscape curves but are difficult to bend into sharp local angles. Rigid structural weathering steel strips resist both bending and flexing; forcing them to make a sharp 90° turn without prior stress-relief scoring can result in a localized “oil drum effect” (buckling) or structural deformation at the top edge.
3. Choose the Bending Method
For thin materials, use the “shim and support” or “clamp and bend” methods. For thicker edges, scoring a shallow line on the back helps create a sharper bend, while preformed corner pieces provide the most consistent results.
Wedge and Support Rod Method
Suitable for thin, lightweight edging strips (1.0 mm to 1.5 mm). Clamp the metal edging between a hard wooden support block and a support rod, then apply firm, even pressure along the length of the bend to fold it to the edge.
Clamping Bending Method
Best suited for standard residential edging strips (1.5 mm to 2.0 mm). Use a square wooden ruler to clamp the edging strip securely to a heavy-duty workbench. Apply manual leverage near the bend line and tap gently with a rubber mallet to form a sharp 90° angle.
Scratch-Bending Method
Suitable for weathering steel edging ranging from 2.5 mm to 3.0 mm. Use an angle grinder to cut a shallow groove along the inner crease line, removing approximately 30% to 50% of the metal wall thickness. This relief groove reduces resistance, allowing you to bend a perfect, sharp 90° right angle by hand.
Cutting and Joining Method
Suitable for thick plates (3.0 mm to 6.0 mm) that are difficult to cold-bend. Cut the edge material neatly into two separate plates along a 45° miter joint or a 90° butt joint. After aligning them on-site, join them using internal connecting pins or corner joint plates.
Prefabricated 90-Degree Corners
Factory-prefabricated L-shaped modules feature pre-welded seams, rolled safety edges, and interlocking connection grooves. They can be connected directly to straight edge sections without the need for on-site metal fabrication.
Professional Metal Bending
For large-scale commercial projects, sheet metal can be processed in the workshop using a hydraulic press brake equipped with V-die dies, enabling the creation of consistent, precisely radiused bends in thick-gauge steel sheets.
4. Gather Tools and Materials
Tape Measure and Steel Right-Angle Square
A heavy-duty steel tape measure and a 90° mechanic’s or carpenter’s square are essential for transferring precise positioning marks onto metal surfaces.
Marking Pen or Chalk
On dark, scaled, or pre-oxidized weathering steel surfaces, marks made with a regular pencil are difficult to read. Use a bright silver metal marker, an oil-based marker, or soapstone chalk.
Clamps or Vices
Choose heavy-duty cast-iron C-clamps or F-bar clamps equipped with rubber or wooden jaw pads. A secure clamp prevents the metal from wobbling or slipping during bending.
Solid Wood Block
A piece of hard wood with a straight grain (such as a 4×4-inch block or a 2×4-inch block of high-density hardwood), with sharp 90° right angles at the edges, to serve as a bending anvil.
Rubber Mallet
A 16- to 24-ounce rubber mallet or non-rebound mallet that will not scratch the surface. Never strike untreated weathering steel directly with a steel claw hammer, as the impact of a hard steel hammer will scratch the surface and dent the top edge.
Angle Grinder and Metal-Cutting Blade
A 4.5-inch (115 mm) electric angle grinder equipped with an ultra-thin (1.0 mm to 1.6 mm) metal-cutting blade, used for scoring or cutting thicker steel sheets.
File or Sandpaper
A 10-inch flat file or 80-grit flap disc for removing sharp metal burrs and smoothing the edges of cuts.
Safety Glasses and Gloves
Safety glasses compliant with ANSI Z87.1, a full-face shield (for use during grinding), heavy-duty cut-resistant leather work gloves, and ear protection.
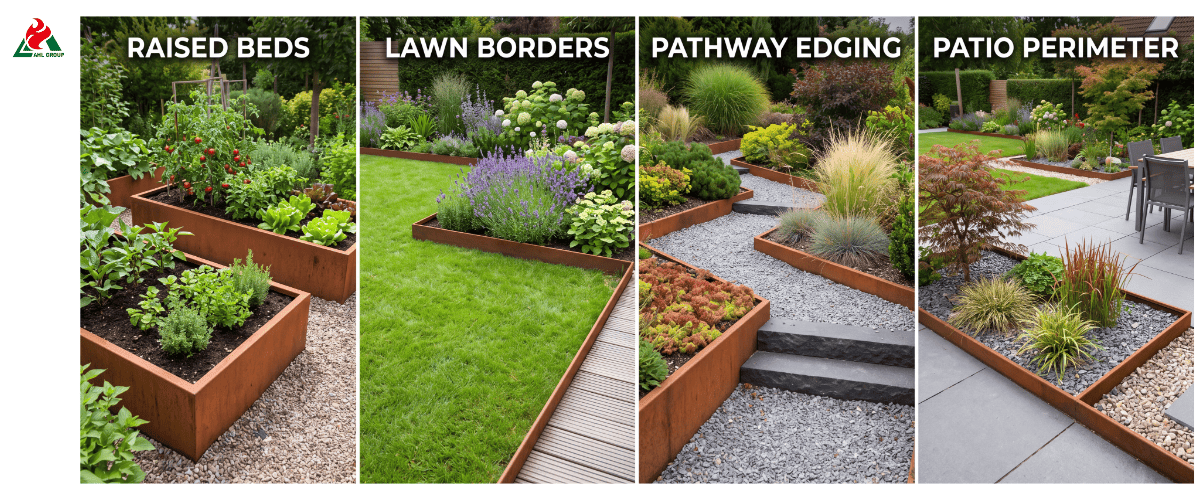
5. Prepare the Work Area
Use a Sturdy Work Surface
Prepare a heavy, sturdy wooden workbench or a pair of heavy-duty saw horses with thick plywood tops. A wobbly work surface will absorb the bending force, making it difficult to form clean, sharp bends.
Clear the Surrounding Area
Maintain a 2-meter clear zone around the bending workstation to allow for handling long, flexible weathering steel strips and to avoid colliding with nearby walls, vehicles, or glass windows.
Support Both Sides of the Strip
When working with long strips (2.0 to 3.0 meters in length), use an auxiliary sawhorse or have someone assist in supporting the overhanging end to prevent premature sagging along the marked bend line.
Protect the Rusted Surface
If working with pre-weathered steel, place clean cardboard or wooden wedges beneath the jaws of the clamps to prevent scratching or scuffing the fragile iron oxide layer that is forming.
Keep Away from Flammable Materials
When scoring metal with an angle grinder, high-temperature sparks may fly up to 3 meters. Before grinding, remove dry leaves, grass clippings, paper, and flammable garden fabric from the work area.
Secure the Workpiece Firmly
Ensure that the main wooden bending block is securely clamped to the workbench to prevent it from shifting or slipping when applying leverage to the metal border.
6. Mark the 90-Degree Bend
Measuring Corner Locations
Carefully measure the groove layout. Mark the exact distance from the end of the strip to the corner point, taking into account the overlapping sections in the interlocking connection system.
Marking Vertical Bend Lines
Place the quick-angle square flush against the upper edge of the Corten metal edging. Using a silver oil-based marker, draw a solid, straight vertical line across the entire width.
Use a Steel Ruler
Ensure that the layout line forms an exact 90° right angle with the upper edge of the edge strip. Even a deviation of just 1° can cause the top edge strip to tilt sideways after bending.
Mark the Inner Side
Be sure to mark the inner side (reverse side) of the bend—the side that will form the inner corner of the 90° bend. This is especially important if you plan to score the metal with an angle grinder.
Allow for Bending Allowance
When bending metal, the crease consumes a small amount of material along the bending radius (i.e., the bending allowance). For thin steel sheets 1.5 mm thick, this allowance is negligible (1 to 2 mm); however, for 3.0 mm-thick steel sheets, add 3 mm to the measured length to ensure the legs are the correct size after bending.
Double-Check the Layout
Before marking or bending, double-check your measurements against the actual garden trench. Correcting over-bent or misplaced creases can weaken the strength of the steel.
7. Bend Thin Corten Edging
You can bend a thin strip of metal against a wooden block or another hard edge. Apply force gradually and use a square to check the angle, rather than trying to complete the entire bend in one go.
Align the Edge with the Wooden Block
Place the Corten landscape edging against a wooden block that has been cut at a right angle, ensuring that the silver marking line is precisely aligned with the sharp 90° outer edge of the block.
Align the Bend Line
Look down at the alignment line from directly above to confirm that it runs parallel to the edge of the wooden block from top to bottom.
Clamp both Sides
Clamp the weathering steel garden edging firmly between the wooden block below and another wooden straightedge above. Tighten heavy-duty C-clamps at both ends to secure the bend line in place.
Apply Pressure Gradually
Put on gloves and grasp the free-hanging end of the steel strip, positioning both hands about 30 centimeters from the bend line to achieve smooth mechanical leverage. Gently pull or push the free end across the wooden block.
Use a Rubber Mallet Carefully
If the steel strip offers significant resistance, use a rubber mallet to tap the metal lightly along the bend line. Tap lightly in sections up and down along the seam, rather than striking forcefully at a single point.
Check the Angle Repeatedly
Stop bending when the bend angle reaches approximately 75° to 80°. Place a steel square against the bend to check your progress, then make fine adjustments until the inside angle reads exactly 90°.
Avoid Over-Bending
Never bend the steel beyond 90° and then attempt to straighten it back. Repeatedly bending the steel back and forth causes work hardening, which can lead to microcracks and weaken the joint’s strength.
Check the Corner Alignment
Place the newly bent section on a flat surface to ensure both edges lie flat in a vertical plane, without any twisting or warping.
8. Score and Bend Thick Edging
To create a continuous acute angle, score the back of the strip at the bend, then carefully pry the strip over a sturdy block of wood. Do not cut all the way through the strip when scoring.
Marking the Back
Using a quick-angle square and a silver oil-based marker, measure and draw a vertical line on the inner side (back) of the 2.5 mm to 3.0 mm thick Corten steel border.
Scoring a Shallow Groove
Fit a 1.0 mm metal-cutting blade onto an angle grinder. Gently move the blade along the marked line to cut a shallow, raised groove.
Depth Guide: The cutting depth should be approximately 30% to 50% of the wall thickness (for example, for 3.0-millimeter-thick steel, the groove depth should be 1.0 millimeter).
Do Not Cut All the Way Through
Keep your hand steady and apply light pressure. Cutting too deeply (>60% of the wall thickness) will weaken the metal wall, causing the strip to break when you attempt to bend it.
Position the Wooden Block
Clamp the scored weathering steel strip securely to the workbench so that the score line is positioned directly above the sharp edge of the wooden support block, with the score facing the direction of bending.
Apply Controlled Lever Force
Grasp the free end of the steel strip and pull it smoothly toward the scored side. The relief groove reduces structural resistance, allowing the steel strip to fold easily along the score line into a sharp right angle.
Reopen the Score If Needed
If the metal gets stuck or encounters resistance before reaching a 90° angle, place the metal landscape edging back on the workbench and gently grind it again with an angle grinder to remove metal shavings from the groove.
Check for Cracks or Kinks
Inspect the outer surface of the finished corner. Since the undented solid outer layer evenly covers the underlying relief groove, the outer corner will exhibit a clean edge free of stress cracks.
Grind the Scored Area
Use a flat file to file away any fine metal burrs or sharp edges along the inner scored seam.
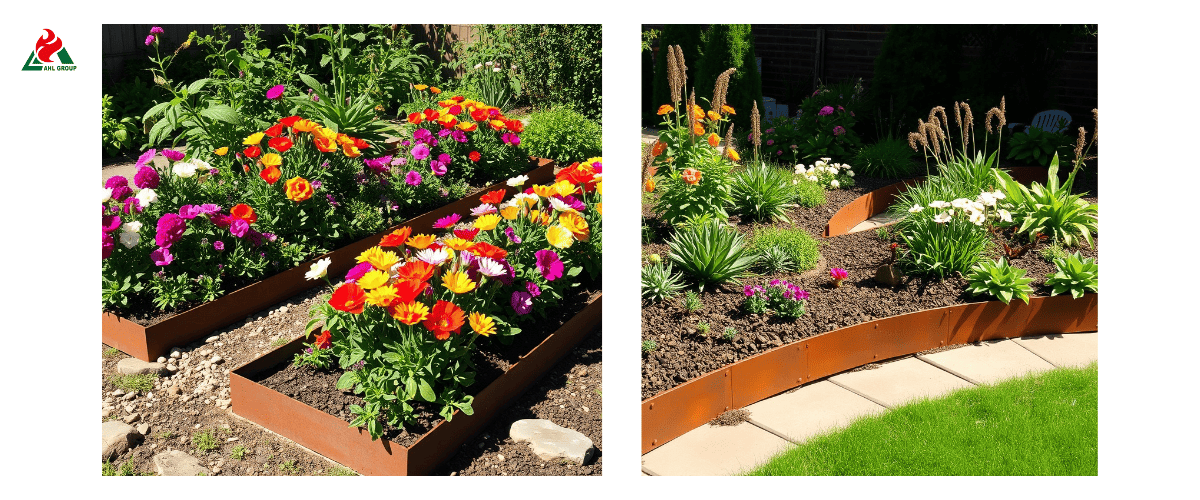
9. Cut and Join Two Sections
Cutting a thick Corten metal edging into two sections and joining them together is usually more precise than forcing it to bend sharply.
Measuring the Two Sections
For heavy-duty structural edge strips (3.0 mm to 6.0 mm), calculate the length required for two separate strips that will join at the corner.
Making Clean Cuts at the Corner
Using an angle grinder fitted with a 1.0-millimeter cutting disc, make clean, straight cross-cuts on both plates. You can use a 90° butt joint or a matched 45° miter joint to achieve a seamless connection.
Remove Burrs from the Cut Edges
Use an 80-grit flap disc to grind or file down any sharp metal burrs, razor-like edges, and scale from the cut edges.
Position the Components
Place the two cut panels into the pre-prepared foundation trench and use a steel square to align them precisely at a 90° angle.
Overlapping Corner Joints
If using an overlapping joint design, position the factory-fabricated connecting flange on Panel A behind the flush-cut edge of Panel B.
Secure with Support Posts or Connectors
Drive heavy-duty weathering steel corner stakes or 90° L-brackets directly behind the joint. Secure the edge panels to the stakes using 316-grade stainless steel self-tapping screws or weathering rivets.
Check the Finished Angle
Before driving the corner stakes fully into the ground, insert a steel square into the finished corner joint and adjust the alignment until the corner is vertical and square.
10. Install the Bent Corner
Drive a wooden stake near the outside of the corner to help maintain the angle when backfilling. Avoid striking the edging directly with a steel hammer; use a rubber mallet or a wooden block instead.
Step 1: Prepare the Trench
Dig a smooth, level, and clean trench along the boundary layout.
Dig a narrow trench along the layout lines, ensuring the trench bottom is level, and lay a 2–3 cm thick layer of coarse sand or gravel at the bottom to ensure proper drainage.
Step 2: Test-Fit the Corner Pieces
Place the 90-degree corner pieces in their designated positions.
Place the pre-bent or pre-cut corner pieces into the trench and check their height alignment by referring to the adjacent straight border sections.
Step 3: Align the Corner Using a Steel Square
Verify vertical and horizontal alignment.
Place a level vertically against the corner surface and use a steel square to check the internal 90° angle.
Step 4: Drive Anchor Piles Near the Corner
Securely anchor the corner to prevent soil displacement.
Drive weather-resistant steel or heavy-duty steel anchor piles directly behind the corner bend (drive an additional pile along the outer face if necessary). Secure the anchor piles to the curbstone using stainless steel fasteners.
Step 5: Backfill and Compact the Soil
Compact the soil on both sides of the corner
Evenly backfill soil, coarse sand, or pea gravel on both sides of the corner, compacting in 5-centimeter layers to permanently secure the corner in place.
11. When to Use a Preformed Corner
When clean, repeatable angles are more important than reducing material costs, we recommend using prefabricated 90-degree and 45-degree corner pieces.
Thick or Rigid Frames
For heavy-duty structural edging (3.0 mm to 6.0 mm thick), factory-prefabricated corners eliminate the need for time-consuming on-site grinding, marking, and welding.
Repeating 90-Degree Corners
When installing geometrically shaped planters, orderly garden layouts, or multi-tiered terraced flower beds requiring dozens of matching right angles, prefabricated corners can save hours of on-site construction time.
High-Visibility Installation Scenarios
For prominent residential front entrances, municipal plazas, and upscale commercial courtyards, prefabricated corners ensure smooth, factory-finished 90° transitions.
Heavy-Duty Landscape Edging
When edging is used to support heavy gravel driveways, earthen retaining flower beds, or paved walkways, prefabricated corners with welded internal stiffeners offer higher structural compressive strength than metal components cut and shaped on-site.
Projects Requiring Precise Alignment
Precast corners feature laser-cut 90° geometry, ensuring precise alignment at complex hardscape joints.
Commercial or Professional Engineering
By using precast corners, contractors can standardize installation quality across construction teams, reduce fabrication errors, and accelerate project completion.
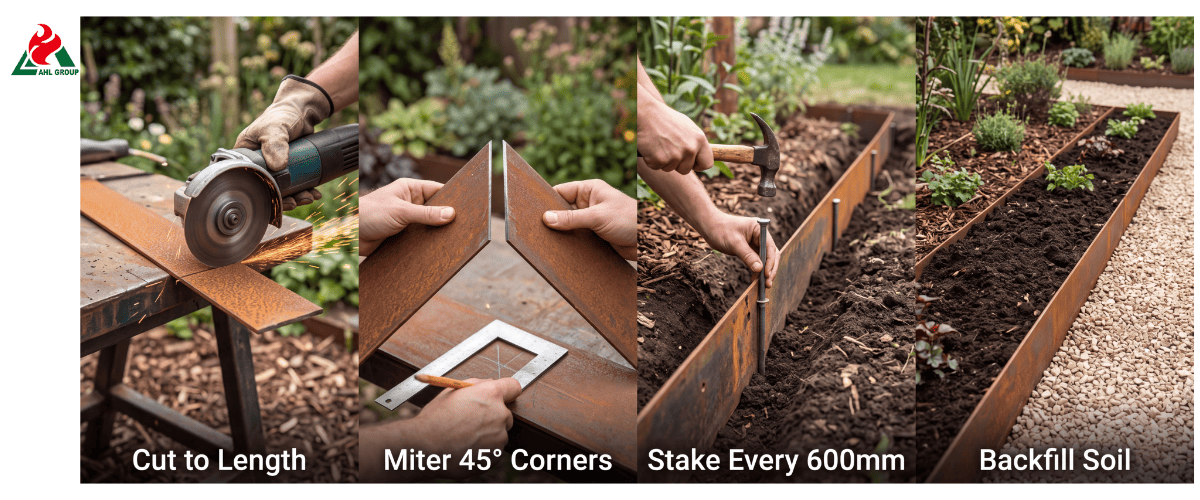
12. Frequently Asked Questions
Q1: Can Weathering Steel Edging Be Bent by Hand?
Thinner weathering steel edging (1.0 mm to 2.0 mm) can be bent by hand using solid wooden blocks, C-clamps, and a rubber mallet. Thicker edge strips (2.5 mm and above) require scoring with an angle grinder first.
Q2: Which Thickness is Easiest to Bend?
1.5-millimeter (16-gauge) Corten edging is the easiest to shape; it offers both the flexibility required for manual bending and sufficient structural rigidity to create clean, defined garden lines.
Q3: Can 3-millimeter weathering steel edging be bent?
Yes, but before bending 3-millimeter weathering steel edging, you should score the back with an angle grinder (to a depth of 1.0 millimeters) or use factory-prefabricated corner pieces for the connection.
Q4: Do I Need an Angle Grinder?
For thin steel sheets between 1.0 and 1.5 millimeters, an angle grinder is not required. However, for thicker weathering steel edging (2.5 mm and above), an angle grinder must be used for scoring or cutting.
Q5: How Do I Create Sharp Corners?
Clamp the steel tightly against a hardwood block with a flat, 90° edge. Apply pressure near the bend line and tap with a rubber mallet to form a sharp bend radius.
Q6: Is It Better to Cut and Join the Pieces?
For thicker structural strips (3.0 mm to 6.0 mm), cutting the steel into two separate pieces and joining them using internal corner braces or miter joints is simpler and more precise than bending by hand.
Conclusion: Final Safety Recommendations
For thin residential Corten landscape edging (1.0 mm to 2.0 mm), use a wooden straightedge, heavy-duty C-clamps, and a rubber mallet to apply the “shim-and-support” or “clamp-and-bend” methods. This allows you to achieve clean, square edges without the need for specialized tools.
For thicker, professional-grade weathering steel edging (2.5 mm to 3.0 mm and above), use the scoring and bending method: use an angle grinder to score a shallow groove on the back, then bend the steel strip along the score line on a wooden block.
When working with heavy-duty structural steel (3.0 mm to 6.0 mm) or on large-scale commercial projects, factory-fabricated 90-degree corners provide optimal structural strength, precise geometry, and quick installation.
Always prioritize safety on the job site: wear ANSI-compliant safety goggles, cut-resistant gloves, and ear protection. Secure all metal workpieces firmly before applying bending force, and grind down any sharp edges to ensure that your landscape edging is both safe and aesthetically pleasing.

