
In the realm of custom landscape design, few elements deliver such a striking impact as Corten steel lighting. Renowned for its deep, earthy patina and industrial-grade resilience, this steel exhibits a “living” texture that evolves with the seasons. When Corten light radiates outward from within, these fixtures transform gardens from tranquil daytime sanctuaries into nocturnal works of art. This guide provides DIY enthusiasts with a professional-grade roadmap covering the entire process—from metallurgical stabilization treatment of steel casings to technical calculations for low-voltage circuits. By following this tutorial, you will create a lighting system that is not only visually stunning but also built to withstand decades of outdoor exposure.
Introduction: The Rustic Appeal of Corten Steel Garden Lights
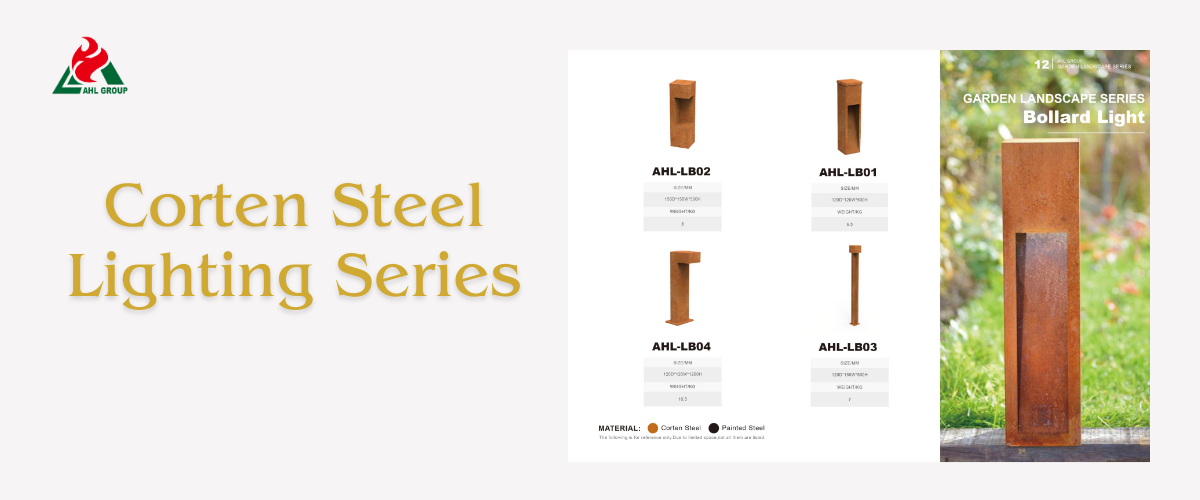
Corten steel outdoor lighting seamlessly blends industrial strength with natural beauty. Unlike traditional powder-coated or plastic fixtures that age under UV exposure, Corten steel (also known as weathering steel) develops a protective oxide layer that effectively prevents internal corrosion. This “self-healing” property makes it an ideal material for high-humidity garden environments. Lighting trends in 2026 have shifted from “bright and stark” to “warm and architectural.” Corten steel lamps naturally soften light through their warm rust-toned filter, creating a mottled, gentle glow that complements natural stone, wood, and greenery. Whether in minimalist bollard lights or intricate laser-cut lanterns, Corten steel lighting infuses outdoor spaces with timeless historical character and artisanal craftsmanship.
Materials and Tools You Will Need
The success of DIY Corten steel lighting projects hinges on component quality. Since Corten steel reacts with the environment, internal electrical components must be suitable for high-humidity settings and feature “sealed” performance to prevent ingress of fine iron oxide dust accumulating within the housing during the initial weathering phase. Mixing high-quality Corten steel with inferior electrical components is the most common cause of premature system failure.
Weathering Steel Lighting Enclosure Components
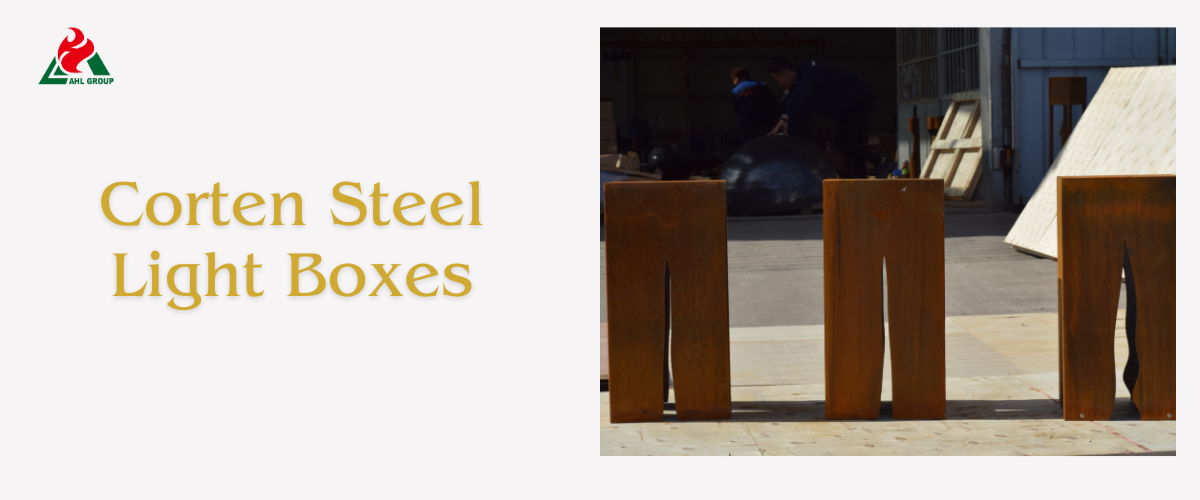
Ensure the enclosure uses genuine weathering steel (Corten-Grade A) compliant with ASTM A588 standards. For DIY projects, pre-cut CNC kits are recommended to guarantee precise assembly and professional-grade seam finishes.
Electrical Components: Wires, Transformers, Sockets, and Bulbs
► Transformers: 150W-300W stainless steel multi-tap transformers suit most residential gardens.
► Wiring: 12/2 or 10/2 direct-buried low-voltage cable.
► Bulbs: Recommended 2700K (warm white) LED bulbs to enhance the steel's orange patina.
Essential Assembly Tools
Required: Electric drill with cobalt alloy drill bits (standard bits cannot penetrate weathering steel's hardness), wire strippers/crimping pliers, trenching shovel, and silicone-filled cable glands for waterproof connections.
.png)
Step 1: Planning Your Layout and Circuit
Before breaking ground, meticulous planning is essential. In 2026, smart landscape design prioritizes “layered lighting” over basic illumination. This involves calculating “voltage drop”—where fixtures at the end of long lines dim compared to those near the power source. Proper planning ensures uniform brightness across all Corten steel landscape lighting throughout the garden, regardless of distance from the transformer.
Sketch the Garden Lighting Layout
Mark the locations of “feature lights” (tall pole fixtures) and “path lights.” Use string lines to simulate cable routing, avoiding high-traffic areas and potential future planting zones.
Transformer Load and Wire Gauge Calculation
Sum the total wattage of all LED bulbs. To prevent overloading, ensure the total wattage does not exceed 80% of the transformer's rated capacity. For line lengths exceeding 100 feet, use 10-gauge cable to maintain voltage stability.
Step 2: Preparing the Corten Steel Light Bodies
If using untreated Corten steel panels or unweathered kits, pre-treatment is essential for achieving a uniform surface finish. Corten steel arrives with a deep gray mill scale that must be cleaned or “activated” to initiate oxidation. Additionally, internal assembly must address “heat dissipation” and “dust protection”—if improperly handled, fine rust particles may compromise lens optical clarity.
Assembling Pre-Cut Corten Kits vs. Working with Raw Sheets
Kits typically feature a “snap-fit” structure. If welding is required, use weathering steel-specific welding wire (E80C-W2) to ensure welds match the panel's color.
Wiring and Drilling Mounting Holes
Weathering steel exhibits higher hardness than standard steel. When drilling holes for electrical outlets, employ low-speed cutting with cutting oil. All holes must undergo deburring to prevent the steel from wearing through the wire insulation over time.
Step 3: Running and Burying the Low-Voltage Cable
The “lifelines” of lighting systems must be shielded from weather erosion and future horticultural maintenance. Trenching is labor-intensive yet critical. The 2026 best practice involves ‘looping’ cables at each landscape light location to reserve ‘service allowance’—this extra cable length permits fine-tuning light placement when plants grow beyond expectations or soil shifts.
Trenching Fundamentals: Depth and Safety
Trench depth must be at least 6-8 inches (15-20 cm). While low-voltage (12V) cables typically require no conduit protection in most regions, wrapping flexible PVC tubing around Corten steel outdoor light bases effectively prevents cable abrasion from sharp steel edges.
Transformer Hub Wiring Specifications
Install transformers at least 12 inches above ground level. After stripping the insulation from the lead wires, secure them to the 12V or 15V terminals, ensuring a tight connection to prevent arcing.
Step 4: Installing and Mounting the Light Fixtures
The quality of Corten steel lights depends on the stability of their base. Since Corten steel is heavier than aluminum or plastic, a sturdy mounting base is essential to prevent the light from tilting due to soil settlement. Additionally, this stage involves the most critical electrical work: creating the “joint.” In DIY scenarios, improper joint fabrication is the primary cause of “ghosting” and flickering in landscape lighting.
Securely Anchor Light Poles or Ground Anchors
For heavy-duty weathering steel poles, pour a small concrete foundation or use 12-inch extra-long heavy-duty steel ground anchors. Use a level to ensure the fixture sits perfectly horizontal.
Achieve Waterproof Wiring Connections
Select direct-buried (DBR/Y-6) junction boxes. These pre-filled with silicone displace oxygen and moisture, preventing copper wire corrosion at internal connection points—a common issue when working with weathering steel in high-iron environments.
Step 5: Final Connections, Testing, and Backfill
The final stage is the “critical moment.” Before burying the cable and completing landscaping, the electrical integrity of the entire circuit must be verified. Load testing detects “voltage sag” and ensures all waterproof seals are properly installed. After system testing, backfilling must be performed carefully to avoid “rock crushing”—where sharp stones embed into cables during soil compaction.
Installing Bulbs and Lenses
Clean LED bulbs with a microfiber cloth to remove human oils that may cause hotspots. Ensure weather-resistant steel housing gaskets are securely seated to prevent “rust seepage” into the lens area.
Final System Testing Before Burial
Activate the transformer at dusk. Patrol the perimeter for dark zones. Use a voltmeter to test the farthest fixture: ideal LED performance should display 10.5V to 12V.
.png)
Tips for Maintaining Your Corten Steel Lights
Although weathering steel is classified as a “low-maintenance” material, it is not “maintenance-free.” Its patina process is dynamic and may be influenced by local pollutants or salt spray environments. The maintenance focus for 2026 lies in “rust layer management”—ensuring the steel develops a deep brown, stable state while preventing excessive corrosion pitting or contamination of surrounding landscapes.
Understanding the Rusting Process and Rust Layer Formation
During the first year, monitor for “bleeding” (staining). Place garden lights on gravel beds or dark-colored covers to contain iron oxide seepage. Never seal the steel until the rust patina fully develops a matte velvety texture.
Seasonal Cleaning and Bulb Replacement
Twice yearly, wipe lenses with a damp cloth and inspect the lamp interior for insect nests or debris. Though LED lights boast extended longevity, spring maintenance should prioritize checking for loose wiring connections caused by frost heave.
Conclusion: Enhancing Your Design with the Finished Look
Corten landscape lighting's ultimate goal is to create spaces that blend modernity with timeless elegance. By adjusting fixture heights and employing “light and shadow magic”—where patterns laser-cut into Corten steel cast intricate silhouettes onto the floor—an immersive environment is crafted. The final effect should resemble the earth's natural extension, with the warmth of light radiating across the richly textured steel surface.
【For custom laser-cut Corten steel lighting kits or DIY project technical support, visit the AHL Group Design Center.】
