


To ensure the stability of Corten steel landscape edging, it should be installed in a level trench on firm, level ground. Bury the edging strips to the required depth according to the specifications of the selected system, and anchor them at joints, ends, curves, and other stress points. Backfill and compact the soil evenly on both sides, maintain unobstructed drainage, and ensure that the soil or mulch remains below the specified final edge height. Never use standard landscape edging as a retaining wall, as it cannot withstand significant earth pressure or support steep slopes.
“Unstable” edging strips may tilt sideways, form waves along straight sections, crack at the seams, sink into soft soil, or buckle upward after winter. Curves may flatten, anchor posts may loosen, or surface runoff may wash away the soil beneath the strips. There is no one-size-fits-all solution for any of these issues.
Corten steel—commonly known as weathering steel—features high rigidity, a thin cross-section, and a rust patina that changes over time. Material strength alone cannot guarantee the stability of a boundary strip. Foundation treatment, burial depth, connectors, anchors, compaction, drainage, and the loads acting on the steel collectively determine whether the installation will remain stable.
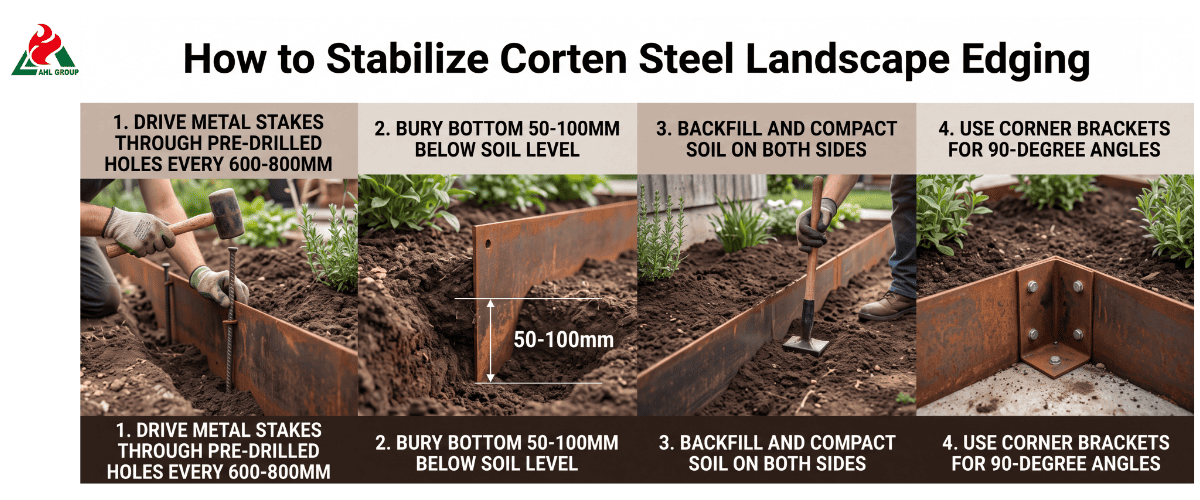
“Unstable” edging strips may tilt sideways, form waves along straight sections, crack at the seams, sink into soft soil, or buckle upward after winter. Curves may flatten, anchor posts may loosen, or surface runoff may wash away the soil beneath the strips. There is no one-size-fits-all solution for any of these issues.
Corten steel—commonly known as weathering steel—features high rigidity, a thin cross-section, and a rust patina that changes over time. Material strength alone cannot guarantee the stability of a boundary strip. Foundation treatment, burial depth, connectors, anchors, compaction, drainage, and the loads acting on the steel collectively determine whether the installation will remain stable.
1. Why Does Corten Steel Landscape Edging Become Unstable
Weathering steel retaining walls become unstable when the ground, anchoring, or geometry cannot withstand the forces acting upon them. Uneven soil pressure, soft subgrade, poor drainage, unreinforced joints, sharp curves, and excessive backfill are all more common causes than insufficient steel strength.
| Visible problem |
Likely causes | Inspect first |
| Edging leans toward lawn or paving |
Unequal soil pressure, shallow embedment, weak anchors or poor backfill | Level difference, stakes and compaction |
| Straight run looks wavy |
Irregular trench, uneven backfill, flexible strip or unsuitable anchor layout | String line, trench wall and stake positions |
| Joint opens or steps |
Weak connector, movement near seam or poor alignment | Joint hardware and support beside the seam |
| Edge sinks |
Soft ground, organic material, erosion or an uncorrected low spot | Base firmness and water path |
| Edge rises after winter |
Freeze–thaw movement, wet frost-susceptible soil or inadequate detail | Drainage, soil and seasonal pattern |
| Curve flattens or bulges |
Radius too tight, spring-back or insufficient support | Product bend capability and curve anchors |
| Slope installation rotates |
Downslope pressure, runoff or an unsuitable edging system | Retained height, slope and drainage |
| Stakes loosen |
Disturbed soil, saturation, impact or incompatible stakes | Soil engagement and hardware condition |
Trenches cut through loose topsoil cannot provide the same support as a firm, undisturbed subgrade. Tree roots, organic debris, and gravel can cause localized unevenness. If the soil on one side is compacted while the other remains loose, the curb strip may rotate. Subsequently, water may soften the subgrade or wash away fine soil through the joints.
Before installing additional support piles, one should first determine whether the failure stems from alignment, subgrade support, anchoring, water, or excessive loads. Adding more hardware will not repair a subgrade that has already been eroded, nor will it transform a separated curb into a retaining wall.
2. What Should You Check Before Installing Corten Edging
Before digging, you should clarify the function of the metal edging, inspect the soil and drainage conditions, draw a geometric layout, and confirm the suitability of the selected product. Do not assume that the same type of edging is suitable for flat lawn edges, gravel paths, raised flower beds, and steep slopes.
First, classify the project. Is the edging intended to separate turf from mulch, to contain loose gravel, to create a decorative raised border, or to maintain a difference in ground elevation? If it adjoins a paved surface, confirm that the system has been approved as a paving restraint structure; never assume that decorative edging can withstand lateral loads from the paved surface.
Next, inspect the soil. Distinguish between firm native ground and newly filled soil. Take note of sandy areas, saturated clay, tree roots, construction debris, erosion gullies, and areas that swell or subside when wet. In cold regions, document the locations of standing water before freezing. Before driving stakes, determine the routes of irrigation, drainage, electrical, and communication lines.
Map the locations of each straight section, curve, corner, free end, joint, slope, and elevation change. Joints located at sharp curves or steep slope transitions may require more support than those on gentle straight sections.
Finally, please conduct a comprehensive review of the entire product system—not just individual slats. Verify the slat height, thickness, or reinforcement profiles; top edge treatment; included fasteners; compatible support posts; approved fasteners; bending capacity; installation guidelines; and any verified height difference restrictions. Sharp corners and unnecessarily high, exposed edges should be kept away from pedestrian walkways and lawn mower paths.
3. What Are the Seven Steps for Stable Corten Edging Installation
Installing Corten steel landscape borders requires following seven interrelated steps. Omitting any one of these steps will place an additional burden on the others.
► Determine a smooth, natural alignment.
► Dig a trench of uniform depth.
► Lay a solid, level subbase.
► Embed the curbstones into the trench according to the product specifications and site conditions.
► Install appropriate support posts at joints, ends, curves, and stress points.
► Connect the panels to form a distortion-free curve.
► Backfill and compact evenly on both sides.
This sequence is critical. If anchors are driven in before the panels are aligned, it may cause long sections of the edge to become wavy. If one side is fully backfilled while the other is not, earth pressure may cause the steel to rotate. If water continues to flow beneath the trench, settlement may occur later, even in well-secured sections.
Keep the manufacturer’s instructions on hand at the job site. Proprietary systems use different profiles, clips, stake positions, and connection methods. General landscape design principles help identify risks but cannot replace product-specific requirements.
Set up temporary control measures—such as string lines, elevation markers, or laser levels—before beginning work. Recheck these control measures after joining and anchoring the sections, as well as during backfilling. It is much easier to correct minor deviations while the trench is still open and the base has not yet been covered with soil, gravel, or sod.
4. Step 1: Set a Smooth and Realistic Alignment
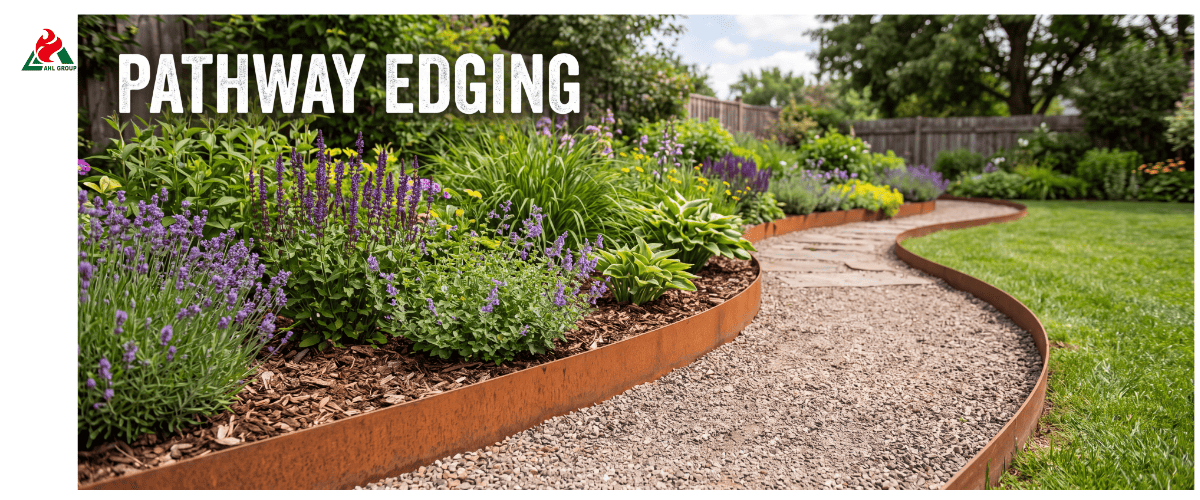
To ensure a level installation, you first need a straight line along which the slabs can be laid; this line should be free of concentrated bends or random lateral loads. Start by determining the endpoints of the straight section, then use a taut string or a laser reference line. Do not simply copy every minor irregularity along the existing lawn edge; instead, deliberately mark a straight line that facilitates excavation and maintenance.
Before excavation, mark the sheet joints, corners, changes in slope, and transition points. View the planned straight section from both ends. Minor deviations that appear harmless from above may become very noticeable when viewed along the top edge.
For curves, use a hose, rope, or flexible marking line to draw a continuous arc. Avoid sudden right angles. Verify the actual minimum radius of curvature for the edging system, as flexibility varies depending on steel thickness, strip height, and any folded edges or reinforcing profiles. Set control points where straight sections enter or exit curves, as well as where S-curves change direction.
At this stage, also determine the final top elevation. The projection height of the edge should be just sufficient to separate the material and achieve the desired aesthetic effect. Excessive exposure height increases the risk of leverage from soil, feet, or equipment, which may pose a tripping or cutting hazard. The alignment must be coordinated with lawn mower wheelbase, pavement elevation, mulch thickness, and future plant growth.
Planning a reasonable alignment ensures even load distribution. Wooden stakes should be used to secure this geometry, rather than to force an impractical shape into place.
5. Step 2: Excavate a Consistent Trench
Dig the trench along the marked line until you reach solid subgrade, ensuring that the sidewalls remain vertical and do not twist. Maintaining uniform contact with the ground is more important than unnecessarily widening the trench.
Remove loose topsoil, tree roots, organic debris, and gravel from the support points. Treat soft areas individually rather than spanning them with reinforcing bars. Elevation changes should transition gradually; avoid over-excavation followed by backfilling the void with uncompacted soil.
Trench depth varies depending on the product and site conditions. It depends on the total height of the outdoor edging, the required exposed height, soil conditions, the elevation difference to be maintained, the anchoring system, erosion, frost damage, and the manufacturer’s instructions. Dimensions intended for a lightweight lawn edging should not be directly applied to taller, sturdier edging profiles on slopes.
Pay attention to water flow in the excavation area. A long trench may inadvertently act as a drainage channel. If the trench intercepts surface runoff but lacks an outlet, water may soften the subgrade or wash away fine soil along the trench. Existing drainage issues should be resolved before installation is completed.
Common mistakes include: inconsistent trench depths, loose or disturbed subgrade, sharp rocks pushing the panels sideways, and trenches excavated too close to unsupported paved surfaces. Locate underground irrigation pipes and cables before driving in anchor bolts. After the trench is excavated, check the alignment and support elevation before placing any reinforcing bars.
6. Step 3: Create a Firm, Level Base
The subgrade must provide sufficient, continuous support for the edging lawns to limit settlement and rotation. When product specifications permit direct installation, stable, undisturbed, and well-drained native soil may be sufficient for low-load separation zones.
Subgrade improvement may be necessary in areas with soft fill, wet clay, eroded areas, material transition zones, or locations where old curbstones have settled repeatedly. Remove unstable organic matter and, where landscape specifications require it, replace unsuitable localized areas with appropriate compactable materials. Compaction should be performed in layers under controlled conditions, rather than attempting to compact a single thick, loose layer of soil all at once.
Maintain a consistent support elevation. If one retaining panel rests on hard rock while an adjacent panel rests on soft soil, visible steps or undulations may form. Never assume that simply laying a loose gravel strip will automatically improve drainage. Without a clear outlet, porous channels may cause water to pool along the edges or divert the flow.
Special attention must be paid to the effects of freeze-thaw cycles. It is noted that steel frames are susceptible to frost heave; however, using steel anchor piles and following proper installation procedures can reduce displacement caused by frost heave. This does not guarantee, however, that shallow frames will withstand all soil conditions prone to frost heave.
Before placing the edging strips, walk along the prepared line and check it with a probe. Any misalignments, bulges, or low spots should be corrected at this time. The base should support the entire system, rather than relying on ground stakes to suspend it above soft ground.
7. Step 4: Embed the Corten Edging Correctly
The embedment depth of Corten steel edging should be determined based on the selected system, exposed height, soil conditions, and loads—rather than using a uniform embedment depth. A sufficient portion of the edging strips and anchoring system must be firmly secured to solid ground to prevent rotation, while ensuring that the visible top remains at the specified finished height.
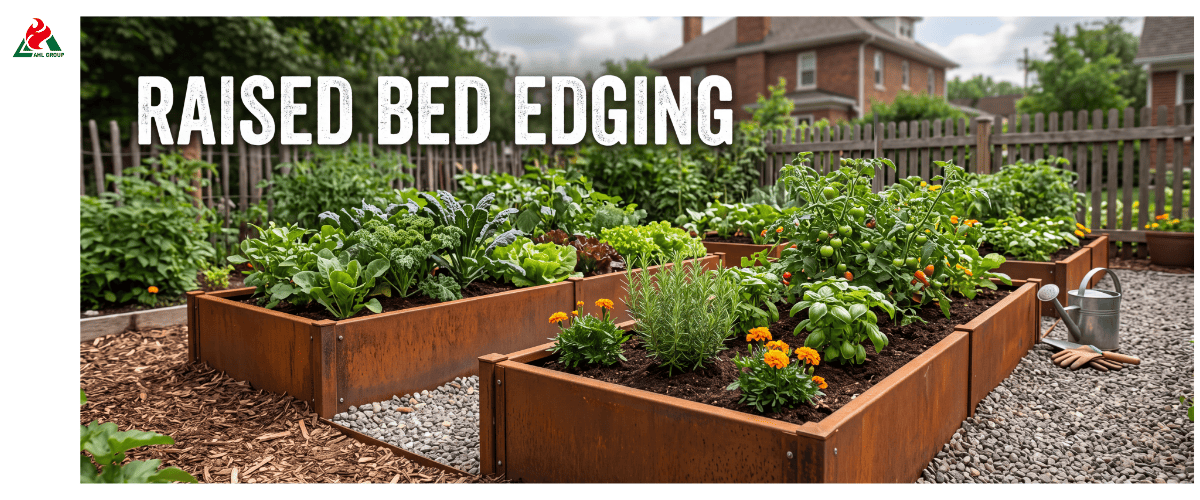
Key factors affecting the burial depth include: the height and thickness of the edging strip, its structural profile, the exposed length, the difference in soil elevation on either side of the edge, whether the route is straight or curved, the risk of impact, drainage conditions, frost damage, and the length of support piles. Thin, flexible edging strips used to separate lawns from ground cover behave very differently from tall, structural edging strips installed alongside raised flower beds.
When installing long edging strips, provide adequate support to prevent deformation caused by their own weight. Use a level, straightedge, or laser level, and repeatedly verify the top elevation before backfilling. If the manufacturer’s instructions permit light tapping for positioning, use the specified tools or wooden blocks in conjunction with a suitable hammer to protect the folded sections or treated top edges. Striking the edging directly with a hammer can cause dents on the top, stretch out holes, or result in inconsistent installation depths.
Always keep the intended relationship between trimming and maintenance in mind. Exposed edges that are too high may catch on equipment, while edges buried too deeply may fail to keep mulch or gravel in place. Do not pile soil and mulch in strips above the design height simply to conceal alignment errors.
If the required visible height or the amount of soil to be retained exceeds the product’s specified application range, stop construction immediately. Select a heavier, more robust system or implement a retaining wall design rather than increasing the burial depth based on guesswork.
8. Step 5: Place Stakes at Joints, Curves and Pressure Points
The spacing of ground anchors should follow the manufacturer’s tested or recommended system and be adjusted based on soil conditions, panel stiffness, geometry, and loads. There is no reliable, universal spacing that applies to all situations for every weathering steel edging product.
Anchors should be placed primarily at free ends, panel joints, corners, changes in elevation, and the transition points where straight sections enter or exit curves. Curves with small radii may require additional support to resist springback. On slopes, attention must be paid to compression points in the downhill direction. Areas likely to be subjected to traffic from lawnmower wheels, foot traffic, or maintenance equipment may also require specialized systems capable of withstanding such forces.
Use the supplied posts, clips, brackets, and fasteners, or those verified as compatible. Anchors should be driven into solid ground rather than relying solely on loose backfill in the trench. Align them with the product’s notches or guide slots to ensure that tightening does not cause the edge strips to warp. Check for underground utilities before driving in any anchors.
Special attention is required at joints, as they interrupt the continuity of the panels. Connectors must be capable of controlling gaps, lateral offset, and vertical steps while ensuring performance meets the manufacturer’s specifications. Some systems place anchors at or near each joint; others use connecting plates or interlocking profiles. Follow the relevant design details and do not make arbitrary modifications.
Never bury bent stakes, damaged holes, or severely deformed clips in the soil. Ensure that no anchor heads or brackets pose a tripping, cutting, or lawnmower hazard. After anchoring is complete, visually inspect the entire installation route again before backfilling and compacting.
9. Step 6: Join Panels and Form Curves Without Distortion
When connecting panels, ensure that the contact surfaces are clean, the top edges are aligned, and all specified fasteners are in place. Tighten the components only after verifying that the alignment and levelness are correct. Replacing proprietary fasteners with uncertified ones may alter load transfer, corrosion behavior, and the ability to maintain alignment.
Where feasible, avoid placing joints at the apex of sharp bends. Curves should be formed gradually along the panel rather than creating a sharp turn between straight sections. Outward bends tend to spring outward and flatten; inward bends may kink if the groove is irregular. Reverse curves require careful support at both tangent transitions.
The flexibility of steel varies significantly. Thin flat strips can be bent by hand into broad, gentle curves, while thick panels with folded top and bottom edges may require factory roll forming or controlled preforming. Verify the proposed radius of curvature with the supplier before excavation. For projects with stringent aesthetic requirements, lay out the curves to actual dimensions and test sample panels.
Where conditions permit, use factory-fabricated corner pieces or approved formed components. On-site bends, miter joints, brackets, or welded corners must comply with system and project specifications. Welding or cutting operations may require processing, edge preparation, and corrosion detail review by qualified personnel.
Inspect from a low angle along the top. Check for stepped misalignments at joints, flat areas within curved sections, and whether anchors cause adjacent sections to shift alternately to the left and right. Correct these defects promptly while the trench has not yet been backfilled.
10. Step 7: Backfill and Compact Both Sides Evenly
Even backfilling anchors the aligned system securely to the ground and prevents it from tilting. Secure the frame at the confirmed line and elevation, control the backfill material in layers, and compact it alternately on both sides. Never allow one side to be fully compacted while the other remains loose.
Even if the wooden stakes are securely fastened, uneven compaction may still cause the strip to bend or rotate. Permanent differences in the final ground elevation can also generate lateral pressure; therefore, please confirm whether this product is suitable for such conditions.
Please handle each type of adjacent material with care:
► Lawn: Maintain the intended mowing pattern and avoid piling soil above the design line.
► Mulch: Do not bury drainage areas, and do not compact wet organic material to the point where it exceeds the design-required steel contact area.
► Gravel: When compacting the support layer, do not push the strip out of alignment.
► Paving: Use the required structural containment measures; decorative edging does not automatically serve as containment for paving stone edges.
Check alignment and levelness repeatedly during the compaction process, not just at the final stage. Where required by the system, ensure that connectors or inspection points are easily accessible. Verify that water can drain from the area without flowing under the edging borders.
The final installation should feature a consistent surface elevation, tight joints, panels that do not rattle, no exposed sharp edges, and no noticeable slopes. Re-inspect after irrigation or heavy rain, as water may reveal hidden settlement or erosion that was not apparent under dry construction conditions.
11. How Do You Keep Corten Edging Straight
Ensure that the Corten metal edging remains straight by maintaining continuous alignment references, uniform grooves, secure supports, aligned joints, gradual anchoring, and even backfilling. Correct any wavy deformations before final compaction.
Please follow the on-site work sequence below:
► Determine the fixed endpoints.
► Stretch a string or set up a laser reference.
► Mark joints and transition points before excavation.
► Remove hard protrusions and soft voids.
► If long strips of material shift during assembly, provide temporary support.
► Align each joint before tightening.
► Anchor progressively from one end rather than randomly.
► Visually inspect the top edge from both directions.
► Backfill both sides in controlled layers.
► Re-inspect after watering or rainfall.
Wavy deformation typically results from irregular trench walls, uneven burial depths, or survey stakes that alternately pull the slats to the left and right. After installation, uneven soil pressure may exacerbate this problem. Additionally, the panels may be too flexible to meet the required exposed height or withstand the impact of the surrounding environment.
Never attempt to correct undulations in a fully compacted panel by tapping the top from the side. This may damage the cross-sectional shape and transfer the problem to adjacent spans. Instead, excavate on both sides of the affected section to relieve pressure, repair the support or anchorage layout, realign the panel, and then recompact it evenly.
Straightness relates to both structural performance and visual appearance. A stable line should not depend on constant lateral stress locked within the reinforcing bars.
12. How Do You Stabilize Corten Edging on Curves
Stabilize the bent weathering steel edging by utilizing the product’s formable radius, fixed transition sections, and tighter sections, and by compacting the material evenly around the curve. Never force rigid profiles into a radius smaller than their design allowance.
Plan the entire arc before cutting the slots. A continuous radius distributes bending stress more evenly than a series of short inflection points. Mark the points where the curve intersects with straight sections, as these are common locations where the strip is prone to displacement.
On the outer arc, the steel tends to spring outward and flatten. Support the curved section to prevent the steel strip from bulging due to localized backfill pressure. On the inner arc, keep the trench smooth to prevent the steel strip from being squeezed or bent. At reverse bends, control the curvature at the point of directional change and along the tangents of the two adjacent sections.
Where the panel layout allows for alternatives, avoid placing weak seams at points of maximum curvature. If a seam must be located there, use the connectors and anchoring details specified by the system. Heavy-duty or reinforced panels may require preforming rather than uncontrolled bending on-site.
Inspect the curves from multiple angles before backfilling. A smooth plan view from above may reveal flat areas at eye level. At the same time, verify maintenance access: narrow inner bends obscured by vegetation may make future mowing, cleaning, or inspection difficult.
Weathering steel can create precise, flowing landscape lines, but this visual effect depends on the alignment of contours and geometry—not merely on greater force or more stakes.

13. Frequently Asked Questions
Q1: How Deep Should Corten Steel Edging Be Installed?
There is no universal installation depth. Please follow the requirements of the selected product and consider factors such as exposure height, steel profiles, soil conditions, load-bearing capacity, drainage, and anchoring. The system must have sufficient contact with solid ground to resist rotation, while not exceeding the product’s intended scope of application.
Q2: How Far Apart Should Corten Edging Stakes Be?
Please follow the manufacturer’s recommended layout. Reinforce ends, joints, curves, corners, areas with changes in slope, and stress points according to system requirements. Due to significant variations in soil conditions, edging stiffness, and loads, it is not possible to establish a single, reliable spacing standard for all products.
Q3: Should Landscape Edging Be Level With the Lawn?
The final height depends on lawn mowing, material gaps, and design. Avoid unnecessary protrusions to prevent increased leverage or safety hazards. Adjust the top height according to product instructions and maintenance equipment.
Q4: How Do You Keep Metal Landscape Edging Straight?
Use fixed end points, a taut string or laser alignment, uniform-depth trenches, sturdy supports, aligned seams, and progressive anchoring. Before final compaction, backfill evenly on both sides and correct any wavy distortions.
Q5: Why Is My Landscape Edging Lifting After Winter?
This may be caused by frost heave, trapped moisture, poor anchoring, or seasonal ground movement. You should excavate and inspect the subgrade and drainage conditions rather than repeatedly tapping the curbs back into place with a hammer.
Q6: Will Corten Edging Stain Paving?
Runoff containing oxides may stain light-colored, porous paving surfaces, especially during the initial weathering phase. Water should be diverted away from susceptible surfaces, and appropriate separation distances should be maintained or protective measures taken.
Q7: How Often Should Corten Edging Be Inspected?
Inspections should be conducted after installation, following heavy rain, after changes in irrigation methods, after nearby earthwork, and after the first freeze-thaw cycle (if applicable). Subsequent inspection frequency should be determined based on slope, soil type, traffic volume, and sun exposure.
Conclusion: How Do You Keep Corten Edging Stable Long Term
The stability of weathering steel curbstones can be ensured by matching the system to its intended function, preparing a solid foundation, maintaining the specified burial depth, protecting joints, and controlling moisture. Stability cannot be achieved with wooden piles alone.
Request a Weathering Steel Borders Installation Assessment: Please provide layout drawings, border profiles, soil conditions, slope, final elevation, and on-site photos to receive project-specific recommendations.
Before comparing prices, carefully review panel height, thickness, profile, fasteners, ground anchor design, bending capacity, verified load-bearing capacity, and installation instructions. Relevant resources may include design inspiration for weathering steel garden curbs, the rust formation process of weathering steel, and measures to prevent rust stains.

