
In the realm of contemporary landscape design, few materials blend raw industrial strength with the beauty of natural evolution as seamlessly as weathering steel. Often referred to simply as “weathering steel,” this material is prized for its ability to develop a protective patina—a protective rust layer that deepens over time, revealing a unique character in specific environments. Whether creating intimate retreats, crafting dramatic architectural backdrops, or constructing functional windbreaks, Corten steel screens stand as a declaration of timelessness and style. Yet only through precise planning and expert installation can its true potential be unlocked. This guide serves as a comprehensive technical resource, empowering you to professionally integrate this “living” material into garden landscapes.
Introduction: Transforming Gardens with Corten Screens
Dual Mission: Privacy, Aesthetics, and Architectural Definition
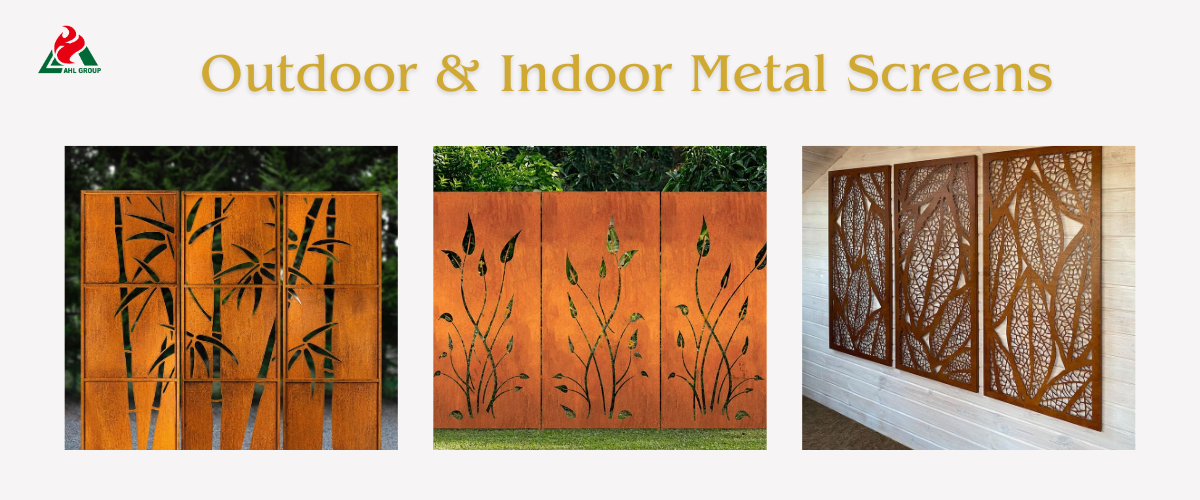
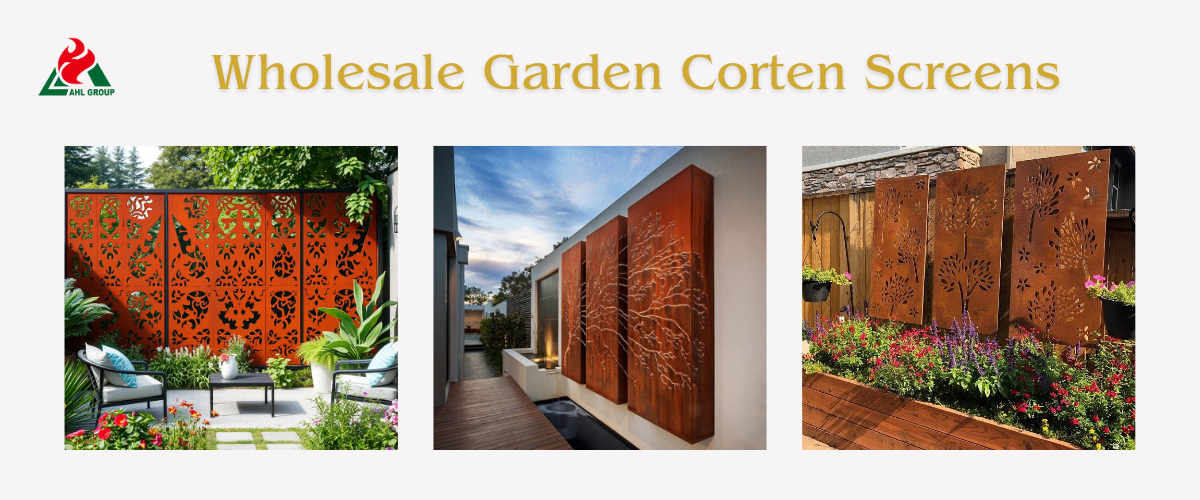
Corten metal screens exemplify functional artistry. They play a vital role in architecture by defining outdoor spaces, screening unsightly views, and creating high-density privacy barriers. Beyond their practical function, their organically evolved textures impart a refined industrial aesthetic that complements modern garden design while seamlessly integrating into traditional landscape layouts.
Installation Quality Determines Long-Term Performance
The quality of Corten steel privacy screens hinges on their foundational engineering. Given the material's substantial weight and susceptibility to environmental factors like wind loads and thermal expansion, any shortcuts during installation may result in structural tilting, uneven rusting, or “rust uplift” at connection points.
What This Guide Covers: From Planning to Post-Installation Care
This guide provides a comprehensive roadmap for professional-grade installation. We'll walk you through site assessment, foundation engineering design, hardware selection, and critical first-year rust layer management—ensuring your screen panel becomes a permanent landmark in your garden.
Pre-Installation Planning: Setting the Foundation for Success
Defining Your Screen's Purpose: Privacy, Wind Break, or Decorative Focal Point
Establish objectives before construction. Screens serving as windbreaks require significantly stronger structural reinforcement and deeper foundations than panels used solely for decorative lighting or plant support.
Measuring Your Space: Determining Optimal Height, Width, and Placement
Consider the garden screen's “visual weight.” Measure the line of sight from primary seating areas to ensure the screen height provides privacy without overwhelming the space. Allow 5-10mm gaps between panels to accommodate expansion.
Checking Local Regulations: Permits, Setback Requirements, and Property Lines
Most jurisdictions classify screen panels as “fences” or “accessory structures.” Confirm height restrictions and setback requirements relative to property lines. Contact local utility locating services before excavation to avoid damaging underground lines.
Assessing Site Conditions: Soil Type, Drainage, and Underground Utilities
Soil stability dictates foundation width. Sandy or loose soils require larger concrete footings to prevent shifting. Ensure areas remain free of standing water, as prolonged saturation hinders the formation of protective rust layers.
Choosing the Right Corten Screen for Your Installation Method
Freestanding Screens: Self-Supporting Design with Integrated Base
These metal screens feature a base with flanges or “feet,” suitable for installation on existing concrete foundations or reinforced terraces where deep foundation excavation is impractical.
Column-Mounted Screens: Sleeve-Mounted or Embedded Column Installation
The most common professional installation method. Screen panels are bolted to rectangular hollow channel steel columns. Columns can be embedded directly into concrete foundations or sleeve-mounted onto internal structural supports for a seamless appearance.
Panel-Mounted Screens: For Installation on Existing Structures (Walls, Fences)
When installing on masonry walls, spacer brackets are mandatory. These create a 20-30mm gap between the steel panel and the wall, ensuring air circulation while preventing permanent staining of the wall surface from verdigris runoff.
Modular vs. Fixed Designs: Flexibility for Future Renovations
Modular systems allow for later panel additions, removals, or layout adjustments. If garden expansion is planned, choose a system with standardized bolt hole positions.
Gathering Tools and Materials
Essential Tools: Shovel, Post Hole Digger, Level, Tape Measure, String Line
Precision is key. The string line ensures the entire fence screen remains perfectly straight, while a quality level or laser level prevents the screen panels from leaning.
Materials Checklist: Concrete Mix, Gravel, Stainless Steel Fasteners, Wooden Stakes
► Concrete: Use quick-setting or standard structural mix.
► Gravel: For drainage at the bottom of holes.
► Fasteners: Must be 304 or 316 grade stainless steel. Galvanized steel or carbon steel will cause electrochemical reactions, leading to structural failure.
Safety Gear: Protective Gloves, Safety Goggles, Steel-Toed Boots
Corten steel edges are sharp, especially laser-cut patterns. Heavy-duty gloves and goggles must be worn during lifting and bolting operations to protect against potential hazards.
Optional Equipment: Concrete Mixer, Electric Drill, Laser Level
For projects involving three or more panels, an electric drill saves hours of labor and ensures consistent hole diameters.
Step 1: Marking and Preparing the Installation Area
Ground Transfer of Survey Data: Layout and Alignment
Drive wooden stakes at the fence's starting and ending points. Tension a chalk line between the stakes; this line will serve as the “control baseline” for all post center points.
Precisely Mark Post or Base Locations
Measure the exact width of the fence panels and allow for necessary expansion gaps. Use high-visibility marking paint to mark the center point of each post hole on the ground.
Clear Vegetation and Debris from Installation Area
Remove turf, weeds, and root systems within a 30-centimeter radius of post locations. Organic matter left at steel foundation points may cause localized corrosion.
Ensure Proper Drainage for Barrier Foundations
Slope the soil slightly to direct rainwater away from foundations. If the barrier is located at the bottom of a slope, installing French drains is recommended.
Step 2: Excavating and Preparing Foundations
Determining Foundation Depth: Frost Line, Soil Stability, and Screen Height
In most temperate climates, foundation pits require depths of 60 to 90 centimeters. When outdoor screen heights exceed 1.8 meters, deeper foundations are necessary to counteract wind leverage effects.
Digging Column Pits or Strip Foundations: Dimensions and Technical Considerations
Pit diameters should be approximately 30 cm. Ensure pit walls are vertical and straight; tapered “V” shapes may be pushed out of the ground due to frost heave.
Laying Gravel Base: Drainage and Leveling Layer
Place a 10 cm layer of clean gravel at the bottom of the pit. This prevents metal posts from sitting in standing water—the primary cause of “post rot.”
Compaction: Ensuring a Stable Base
Use a tamper to compact the gravel layer. A solid base prevents post sinking during heavy concrete pouring.
Step 3: Setting Posts or Anchor Systems
Column Positioning: Vertical, Horizontal, and Aligned Along Plumb Line
Place the column into the pre-embedded hole. Use a plumb line to check alignment and ensure the column is perfectly vertical in both axes (verticality) with a level.
Concrete Mixing and Pouring: Proper Proportioning and Techniques
Pour concrete around the column, stopping 5 cm above ground level. Pro tip: Form the concrete top into a crowned slope away from the column for drainage.
Temporary Support: Securing Columns During Curing
Use scrap wood and clamps to hold columns vertically. Even slight tilting during drying will prevent panel installation.
Ensure Adequate Curing Time: Proceed Only After 24-48 Hours
Never suspend heavy steel plates on “unhardened” concrete. Wait at least 24 hours (48 hours in cold/damp weather) until the concrete achieves structural stability before proceeding with subsequent operations.

Step 4: Attaching the Corten Screen Panels
Heavy Plate Handling: Lifting Techniques and Teamwork
Weathering steel has a high density (7850 kg/m³). Always use at least two people when moving plates. Lift using leg strength, not your back, and coordinate movements precisely.
Fastener Selection: Why Stainless Steel Is Irreplaceable
Stainless steel does not react with the alloy elements in weathering steel. Carbon steel bolts corrode rapidly, while galvanized bolts develop unsightly white zinc spots on the orange rust layer.
Connection Methods: Welding, Bolting, or Clamping?
Bolted connections are recommended for garden installations, allowing for fine adjustments. While welding provides permanent strength, it requires grinding the joint area and reapplying weathering treatment.
Maintaining Alignment: Horizontal and Vertical Checks During Installation
Re-check levelness after securing each panel. Self-weight may cause slight system displacement—adjust as you install, never delay until final assembly.
Inter-Panel Connections: Gap Management and Consistency Control
Use “shims” (e.g., 5mm plywood pieces) during installation to ensure perfectly uniform gaps across entire rows.
Step 5: Backfilling and Finishing the Base
Backfilling Around the Post: Soil vs. Gravel vs. Concrete
Fill the remaining 5 cm of the hole with soil or decorative stone to conceal the concrete base.
Creating a Neat Finish: Integrating Frames, Coverings, or Groundcover Plants
Blend the privacy screen into the landscape using groundcover or low-growing plants. Ensure groundcover does not directly pile onto the steel, maintaining a slight air gap.
Protecting the Base from Lawn Equipment Damage and Erosion
Prevent lawnmowers or trimmers from striking the base, which could disrupt the developing patina and expose the steel to excessive moisture.
Final Cleanup: Removing Debris and Construction Residue
Wipe panels with a damp cloth to remove oily fingerprints or construction dust, ensuring even patina formation.
Post-Installation Care and Patina Management
Initial Months: Managing Early Leaching and Stains
During the “weathering” phase, the screen fence will release iron oxide. If installed over expensive paving surfaces, use temporary plastic sheeting or lay a sacrificial gravel layer to collect leaching material.
Protection for Adjacent Surfaces (Paving, Decks, Plants)
To accelerate the formation of a deep brown patina and shorten the leaching period, apply a “maturation-type” patina catalyst.
Expected Results: Patina Formation Cycle (6-18 months)
The screen will gradually transition from orange-red to a deep chocolate-brown “stable” state over 6 to 18 months, depending on local humidity and rainfall.
Cleaning Timing and Methods for New Corten Steel Screens
Cor-Ten steel typically requires no maintenance. If bird droppings or mud accumulate, rinse with low-pressure water only. Never use harsh chemicals or wire brushes.
Climate-Specific Installation Considerations
High Wind Zones: Deepen Foundations and Reinforce Connections
In “wind zones,” use thicker steel specifications (3mm or 5mm) and increase column hole depth by 30%. Ensure laser-cut patterns maintain at least 40% airflow permeability to reduce the “sail effect.”
Coastal Installation: Enhanced Corrosion Management and Freshwater Flushing
Salt spray accelerates corrosion. In coastal areas (within 2 km of the sea), flush screens with freshwater every few months to remove salt deposits.
Cold Climate/Frost Zones: Foundation Depth Below Freezing Line
If excavation does not extend below the frost line, ground pressure will lift the protective netting above ground level within one to two winters.
Sandy or Unstable Soils: Special Foundation Requirements
In sandy soils, employ a “flared” foundation (wider at the base than the top) to enhance the uplift resistance of anchors.
Professional Installation vs. DIY: Making the Right Choice
When DIY Makes Sense: Small Screens, Simple Designs, Experienced Handyperson
If you are proficient in using post-hole diggers and spirit levels, and the landscape screen size is less than 1.5 meters, DIY is a cost-effective option.
When to Call Professionals: Large Panels, Complex Sites, Commercial Projects
When screen panel dimensions exceed 2 meters, sites feature slopes, or involve public-facing commercial areas, the risk of structural failure necessitates professional engineering design and installation.
What Professional Installation Includes: Engineering, Equipment, and Warranties
Professional teams utilize power drills and laser levels, crucially offering structural displacement insurance and warranty services.
How AHL Group Supports DIY and Professional Installers
AHL Group provides detailed CAD drawings, technical data sheets, and dedicated support hotlines to ensure the successful completion of projects of all sizes.
Conclusion: Your Screen as a Permanent Garden Landmark
A successful installation requires balancing the heavy industrial nature of steel with the delicate details of garden design. From the first shovel of earth to the final stainless steel bolt, each step lays the foundation for lasting durability. When properly constructed, your Corten screen will outlast other garden elements, developing a unique patina over time.
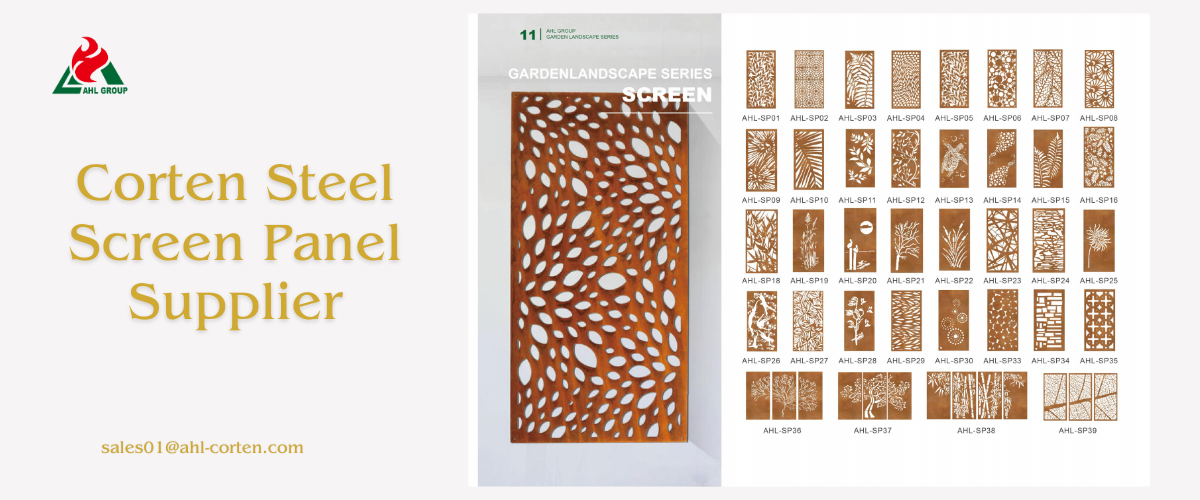
AHL Group offers an extensive library of laser-cut patterns and structural configurations to accommodate diverse landscape visions. Need site-specific recommendations? Our technical engineers stand ready to help transform your garden blueprint into a tangible structure.
