


Corten steel privacy screens can transform ordinary gardens, patios, balconies, or outdoor entertainment areas into spaces that offer greater privacy and a distinctive visual appeal. Their warm, rust-colored patina lends a natural texture to the structure, complementing wood, stone, concrete, and greenery particularly well.
However, to build a weathering steel privacy screen within your budget, simply purchasing inexpensive steel sheets isn’t enough. The total cost also depends on factors such as sheet thickness, dimensions, support posts, foundations, fasteners, fabrication, transportation, and installation.
The good news is that a durable DIY Corten privacy screen doesn’t have to be expensive. By choosing appropriate panel sizes, simplifying the support structure, properly planning the foundation, and avoiding unnecessary fabrication steps, you can reduce costs without compromising safety or aesthetics.
This guide will explain in detail how to plan, build, install, and maintain an affordable weathering steel privacy screen while avoiding the most common DIY mistakes.
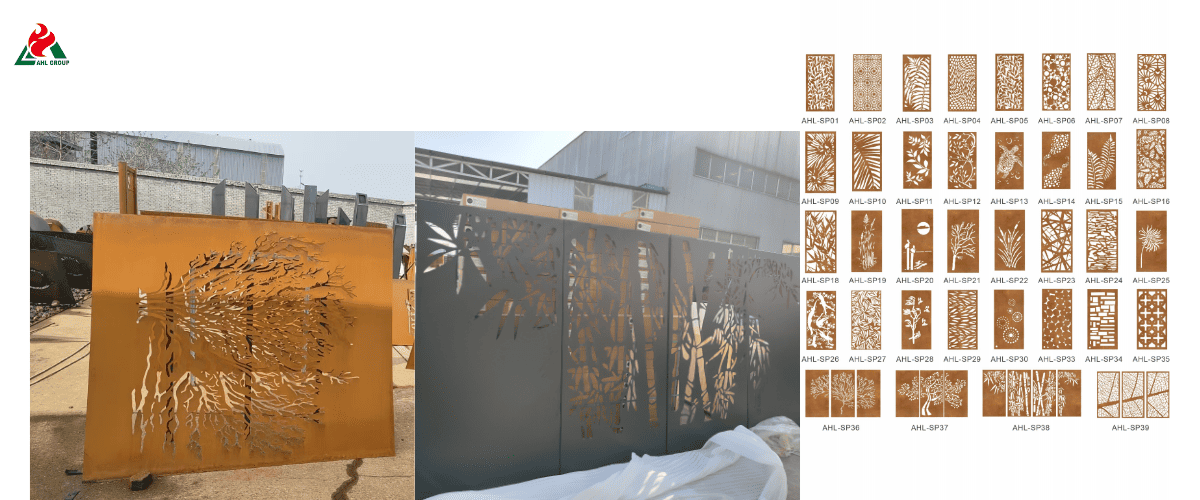
However, to build a weathering steel privacy screen within your budget, simply purchasing inexpensive steel sheets isn’t enough. The total cost also depends on factors such as sheet thickness, dimensions, support posts, foundations, fasteners, fabrication, transportation, and installation.
The good news is that a durable DIY Corten privacy screen doesn’t have to be expensive. By choosing appropriate panel sizes, simplifying the support structure, properly planning the foundation, and avoiding unnecessary fabrication steps, you can reduce costs without compromising safety or aesthetics.
This guide will explain in detail how to plan, build, install, and maintain an affordable weathering steel privacy screen while avoiding the most common DIY mistakes.
1. Why Choose a Corten Privacy Screen for a DIY Project
The Advantages of Weathering Steel for Outdoor Privacy
Weathering steel (Corten steel) is specifically designed to form a dense, self-healing layer of iron oxide rust when exposed to alternating dry and wet conditions outdoors. This protective rust layer effectively prevents oxidation deep within the structure, eliminating the need for sealants or periodic repainting. In addition to its long service life, weathering steel offers high structural tensile strength, a unique warm earth tone, and a slim panel profile—providing immediate privacy without taking up valuable yard space.
Comparison of Weathering Steel with Wood and Other Privacy Screen Materials
Although pressure-treated pine or cedar boards have a lower initial material cost, they require annual staining and maintenance to prevent warping and will eventually need to be replaced due to rot or termite damage. Powder-coated aluminum panels, while rust-resistant, lack the rich, naturally evolving aesthetic of weathering steel and are prone to denting upon impact. Weathering steel strikes a balance between industrial-grade strength and low maintenance costs over its lifetime, making it a reliable material for outdoor architectural components.
Is Weathering Steel Cost-Effective in the Long Run
Although the initial price of standard weathering steel raw sheets or pre-cut panels is higher than that of softwood, their zero-maintenance lifespan makes them extremely cost-effective over a 10- to 25-year service life. If homeowners choose to install the fencing themselves rather than hiring a landscaping contractor, they can save in labor costs. This brings the total cost of the project close to that of installing a high-end wooden fence, while also providing superior structural durability.
2. How Much Does a DIY Corten Privacy Screen Cost
Steel Plate Thickness and Its Impact on Price
Steel plate thickness directly affects material costs and structural integrity:
| Gauge / Thickness | Nominal Thickness | Primary Application | Cost Index (per panel) |
| 16-Gauge | ~1.5 mm | Small decorative accents, low-wind areas | $ (Lowest cost, higher flex) |
| 14-Gauge | ~2.0 mm | Standard residential privacy screens | $$ (Optimal value/rigidity) |
| 11-Gauge | ~3.0 mm | Heavy-duty, commercial, high-wind zones | $$$ (Higher cost, max stability) |
How to Reduce Material and Installation Costs
► Purchase standard-sized plates: Design column spacing based on standard modular panel dimensions (48 × 24 inches or 72 × 36 inches) to avoid the cost of custom steel plate cutting.
► Use a hybrid support structure: Combine weathering steel panels with pressure-treated, dark-stained wood posts as an alternative to expensive custom weathering steel structural posts.
► Choose simple geometric shapes or solid panels: Complex custom laser-cut screens increase processing time and unit costs; simple geometric cuts or solid panels, on the other hand, cost significantly less per square foot.
3. How to Plan a Budget-Friendly Corten Privacy Screen
Measure the Installation Area
Use a string line and stakes to accurately mark the outer perimeter. When calculating the total length, take the width of the posts into account to avoid having to cut the steel panels on-site.
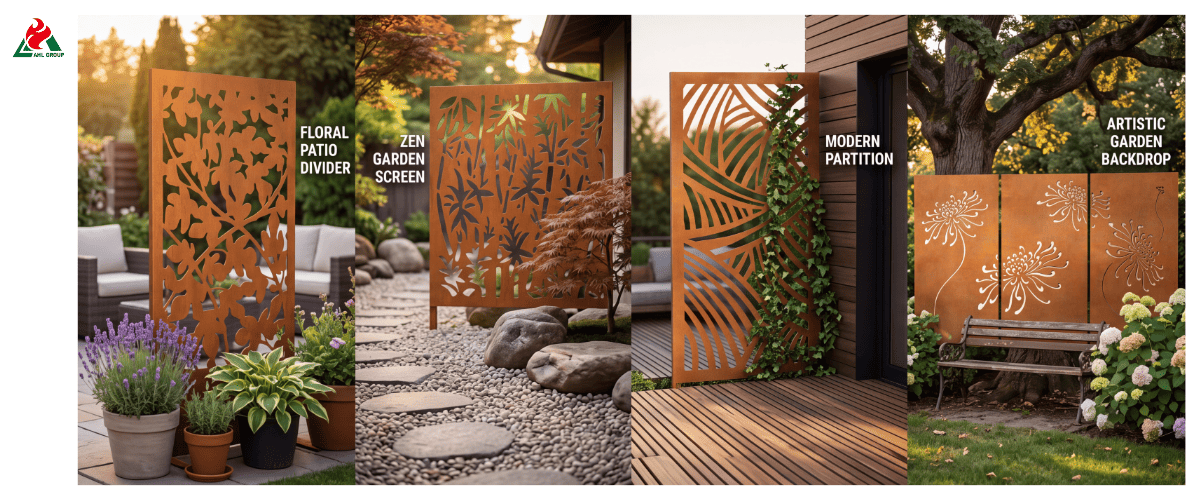
Select the Appropriate Screen Mesh Size and Pattern
Laser-cut patterns with high light transmittance (40% or higher) allow air to pass through easily—thereby reducing the structural load on the support posts—while still blocking direct lines of sight. Solid or low-transparency patterns (10% to 20% light transmission) provide maximum privacy but require thicker posts and deeper concrete foundations to withstand wind loads.
Calculate the Number of Screen Panels and Posts
Use the following formula to determine the number of structural units required for a linear screen. Ensure that every two adjacent screen panels share a single center support post to minimize the amount of hardware needed and the amount of excavation required.
Verify Local Building and Zoning Requirements
Consult local homeowners’ association (HOA) regulations and municipal zoning ordinances to understand requirements regarding property line setbacks and maximum fence heights (typically capped at 6 feet or 1.8 meters without a building permit).
4. What Materials and Tools Do You Need
Weathering Steel Sheets
Select genuine sheets that comply with ASTM A588, A606-4, or Corten Grade A standards, with a thickness of No. 14 (2.0 mm), to achieve the optimal balance between cost-effectiveness and wind-bending resistance.
Posts, Frames, and Mounting Hardware
► Posts: 2×2-inch (50×50-millimeter) square steel tubing or 4×4-inch pressure-treated wood posts.
► Fasteners: 304 or 316 grade stainless steel self-tapping screws with EPDM rubber washers. Never use standard galvanized or untreated carbon steel screws, as they will corrode rapidly when in contact with weathering steel.
Concrete and Foundation Materials
► Quick-setting concrete mix (50-pound bags).
► Crushed gravel base (3/4-inch clean aggregate) for foundation drainage.
Essential DIY Tools
► Post hole digger or auger.
► Level and string line.
► Cordless drill and metal drill bits.
► Angle grinder with a flap disc (for cutting and removing burrs from edges, if necessary).
► Personal protective equipment (safety goggles, cut-resistant gloves).
5. How to Choose the Right Corten Steel for a Privacy Screen
Recommended Weathering Steel Grades
When purchasing steel sheets or panels, please verify the technical specifications:
► ASTM A606-4: Standard specification for cold-rolled atmospheric weathering steel sheets. Ideal for thin, decorative, laser-cut screen panels.
► ASTM A588: Hot-rolled structural weathering steel, best suited for heavy-duty load-bearing columns or thick structural frames.
Selecting the Appropriate Panel Thickness
Please avoid purchasing ultra-thin No. 18 or No. 20 (<1.0 mm) metal sheets sold by discount retailers; thin panels are prone to warping, rattling in the wind, and producing an “oil drum effect” when exposed to sunlight. For freestanding screens, use No. 14 (2.0 mm) as the minimum thickness standard.
Comparison of Solid Screens and Laser-Cut Screens
► Solid screens: Completely block the view, provide excellent wind resistance, and feature modern, clean lines. They require a sturdy foundation to withstand wind loads.
► Laser-cut screens: Filter sunlight, enhance air circulation, and serve as decorative elements. Their lower wind resistance allows for a lighter support structure.
6. How to Build a DIY Corten Privacy Screen Step by Step
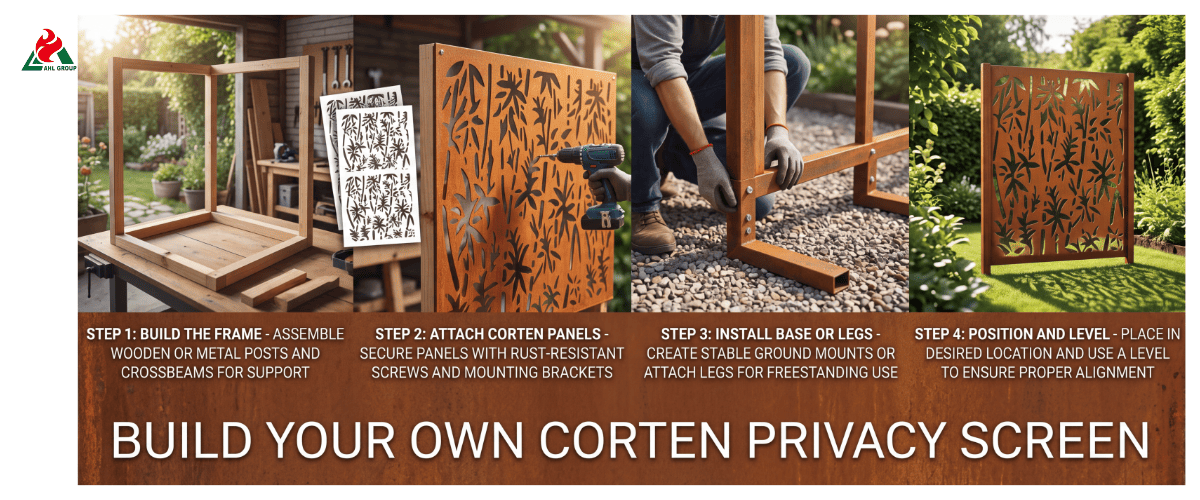
Step 1: Delineate the Installation Area
Determine the layout lines and mark the center points of the posts.
Drive wooden stakes into the ground at both ends of the planned installation area for the privacy screen, and stretch a rope tightly between them. Measure the exact center-to-center distance between the posts based on the width of the screen plus the installation clearance for hardware, and use marking spray paint to mark the post hole locations on the ground.
Step 2: Prepare the Foundation
Dig the foundation below the local frost line.
Use a post hole digger to dig the post holes. The hole depth should be at least one-third of the total post height, plus 6 inches for a gravel base (typically 24 to 36 inches deep and 10 to 12 inches wide). Place 4 to 6 inches of crushed gravel at the bottom of each hole to ensure proper drainage.
Step 3: Install Support Posts
Secure the support posts vertically in quick-setting concrete.
Insert a steel or wooden support post into the center of the hole. Pour dry-mix quick-setting concrete around the support post to a height of 2 inches below ground level. Add clean water according to the instructions on each bag, and use a level and temporary 2x4 support boards to keep each support post vertical while the concrete sets (at least 4 hours).
Step 4: Installing Corten Steel Panels
Secure the steel sheets using stainless steel fasteners and rubber vibration-damping pads.
Pre-drill pilot holes in the flanges of the weathering steel panels and the support columns. When installing the panels, leave a 1/2-inch (12-millimeter) gap above the ground to prevent contact with the soil. Secure the panels with 304/316 stainless steel screws fitted with EPDM rubber washers to insulate the metal and prevent electrochemical corrosion.
Step 5: Check Alignment and Stability
Verify the level and confirm the structural rigidity.
Place a 4-foot-long level across the top edge of the installed panels to ensure height alignment across the entire section. Push firmly against the structure to test it and confirm there is no abnormal swaying or loose fasteners in the support frame.
Step 6: Allow the Steel to Weather Naturally
Allow natural weather cycles to form a rust patina.
Weathering steel leaves the factory with a raw, dark gray rolled surface. Allow it to undergo 3 to 12 months of natural exposure to rain and sunlight to form its characteristic orange-brown protective rust patina. Optional accelerated aging sprays (water, hydrogen peroxide, or salt solutions) can speed up the initial surface rusting process.
7. How to Install Corten Privacy Screens Without Overspending
Use Standard Panel Sizes
Design partitions based on mass-produced panel sizes (24 × 48 inches, 36 × 72 inches, or 48 × 96 inches) to reduce material costs by up to 40% compared to custom metal sizes.
Minimize Cutting and Processing
Adjust the spacing between posts to accommodate full, uncut panels, thereby avoiding unnecessary angle grinding or panel trimming. On-site cutting not only takes time but also dulls saw blades and exposes unpassivated edges, which take longer to develop a uniform rust layer.
Choose a Simple Support Structure
Instead of custom-welding expensive weathering steel frames, use surface-mounted steel angle brackets or simply bolt channel steel brackets directly to standard square columns.
Turn Your Privacy Screen Idea Into a Custom Corten Design!
8. How to Prevent Common Corten Privacy Screen Problems
Dealing with Rust Runoff and Stains
During the first 6 to 12 months of natural weathering, rainwater will wash free iron oxide particles off the surface of untreated Corten steel. This orange-colored rust runoff can permanently stain porous surfaces, such as light-colored concrete, natural sandstone, or light-colored pavers.
Solution: Dig a 4-inch-deep drainage trench directly beneath the screen and fill it with dark-colored crushed river gravel; or pre-treat pre-weathered panels in a separate grassy area by spraying them with hydrogen peroxide before installing them over finished hardscape.
Preventing Screen Movement in High Winds
Large, solid garden screens act like sails and are subject to wind forces during high winds. Be sure to use at least 14-gauge steel, embed the support posts in concrete to a depth of at least 24 to 36 inches, and install horizontal bracing beams at the midspan for screens taller than 6 feet.
Avoiding Ground Contact and Moisture Trapping
Weathering steel requires continuous cycles of wet and dry weathering to maintain its protective rust layer. If the bottom of the steel panels is buried for extended periods in damp soil, mulch, or standing water, it can lead to permanent moisture saturation, which in turn causes persistent penetrating corrosion. Ensure that the top of the steel panels maintains a gap of at least 1/2 inch to 1 inch between the soil or hardscape.
Selecting Compatible Fasteners
Standard galvanized steel or hot-dip galvanized screws can cause electrochemical corrosion when they react with weathering steel. Use 304 or 316 grade stainless steel fasteners with EPDM rubber spacer washers to isolate the metal surfaces.
9. How to Make a DIY Corten Privacy Screen Look More Expensive
Choose Simple, Consistent Patterns
Opt for simple, repetitive geometric patterns or straightforward vertical slats. Overly complex, multi-themed patterns can appear cluttered, thereby diminishing the design quality of a small backyard space.
Combine Weathering Steel with Plants and Landscaping
The deep reddish-orange rust of weathering steel creates a striking visual contrast with lush green foliage. Plant dark ornamental grasses (Ophiopogon planiscapus), bamboo, or evergreen shrubs (Buxus) directly in front of the outdoor screen to set off the metal elements.
Use Lighting to Highlight the Rust
Install low-voltage LED uplights or warm-toned (2700K) spotlights at the base of the privacy screen. At night, dramatic upward-angled lighting accentuates the laser-cut patterns and the rich texture of the weathering steel.
Create Visual Balance with Multiple Screens
Instead of building a continuous, solid metal wall, arrange two or three weathering steel screens in a staggered pattern, alternating wooden posts or climbing vines in the gaps to create a sense of depth and visual interest.
10. How to Maintain a DIY Corten Privacy Screen
Does Weathering Steel Need to Be Painted or Sealed
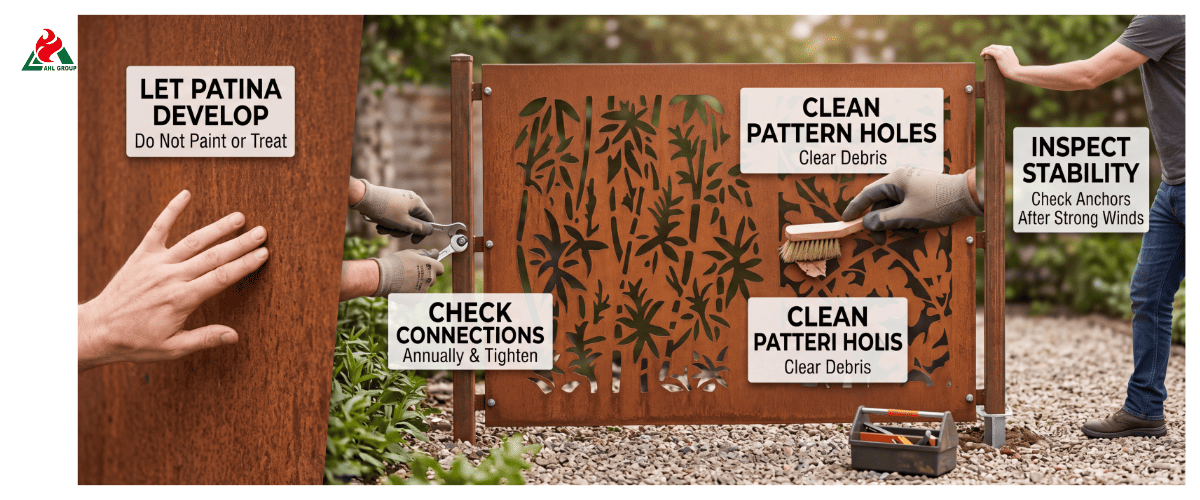
No. Painting or applying a clear sealant will compromise the self-protective atmospheric properties of weathering steel. Sealants may peel, crack, and trap moisture underneath, leading to patchy corrosion that is difficult to repair. The metal should be allowed to form a natural oxide layer.
How to Handle Initial Rust Runoff
During the first few heavy rainstorms, rinse the surrounding hardscape with clean water. If rust stains appear on adjacent concrete, scrub the surface with a mixture of water and oxalic acid or a commercially available rust remover.
Inspect Posts, Fasteners, and Foundations
Inspect once each spring: Ensure all stainless steel mounting screws are securely fastened, verify that the rubber isolation washers are intact, and remove any fallen leaves or debris accumulated directly against the bottom of the panels.
Maintaining the Surrounding Landscape
Prune climbing ivy or dense vines promptly to prevent them from entangling the back of the panels. Dense vegetation traps moisture on the metal surface, preventing the steel from drying completely between rainstorms.
11. DIY vs. Buying a Custom Corten Privacy Screen
When Is It Best to Install It Yourself
If you’re familiar with basic power tools, can dig foundation holes for posts, know how to use a level, and are working with a limited budget, then building a metal screen yourself using prefabricated modular weathering steel screen panels is an ideal choice.
When Is a Custom-Made Screen More Practical
If your site has a steep slope, requires heavy-duty structural welding, necessitates complex engineering drawings for permit applications, or involves a large-scale commercial installation project exceeding 8 feet in height, it is recommended that you hire a custom fabrication shop or landscape contractor to handle the installation.
12. Frequently Asked Questions About DIY Corten Privacy Screens
Q1: Can I Build a Corten Steel Privacy Screen Myself?
Yes. Using prefabricated modular Corten steel panels combined with standard steel or wooden posts, this is a simple weekend DIY project. All you need are basic tools such as a power drill, a post hole digger, a level, and a tape measure.
Q2: What Should Be the Thickness of Corten Steel Privacy Screen Panels?
The recommended thickness for residential outdoor privacy screens is 14 gauge (2.0 mm). Avoid using panels thinner than 16-gauge (1.5 mm), as they are prone to warping under wind loads.
Q3: How Do You Install Weathering Steel Privacy Screen Panels on the Ground?
Secure square steel posts or pressure-treated wood posts in concrete footings that are 24 to 36 inches deep. Use stainless steel self-tapping screws with rubber isolation washers to attach the weathering steel panels to the posts, ensuring the panels are at least 1/2 inch above the ground.
Q4: How Can Rust Stains from Weathering Steel Be Prevented from Staining Concrete?
Avoid placing untreated weathering steel panels directly against light-colored concrete. Install a gravel drainage trench beneath the screen to collect initial runoff, or, before final installation, place the panels on a grassy area and spray them with a hydrogen peroxide solution for pre-weathering treatment.
Q5: Do Corten Steel Privacy Screens Require Maintenance?
No. Corten steel naturally forms a protective layer of rust, which prevents deep corrosion. Throughout its entire service life, it does not require painting, staining, or chemical sealing.
Q6: Are Weathering Steel Privacy Screens Suitable for Installation in Windy Areas?
Yes, provided you choose a laser-cut pattern with a high open area ratio (over 30%) to ensure air circulation, use 14-gauge or 11-gauge steel, and securely anchor the support posts in deep concrete foundations.
Conclusion: Building an Affordable and Durable Weathering Steel Privacy Screen
Building your own Corten steel outdoor screen is one of the most cost-effective ways to enhance the quality of your outdoor living space, add a modern touch, and enjoy virtually maintenance-free results. By selecting standard pre-cut 14-gauge panels, installing sturdy post foundations below the frost line, and using compatible stainless steel hardware, you can complete the installation in just one weekend at a fraction of the cost of hiring a contractor—creating a stylish and durable privacy screen that will last for decades.

