
Creating flawless garden borders demands not only design vision but also strict adherence to safety protocols. Whether planning formal pathways or installing root barriers to protect lawns, understanding technical risks is paramount—from accidental damage to high-pressure pipes to cuts caused by specific materials, no hazard should be overlooked. This guide provides homeowners and gardening enthusiasts with industry-standard safety procedures, helping you achieve flawless results while avoiding the hidden dangers of outdoor excavation.
Introduction: The Professional Guide to Landscape Edging Safety
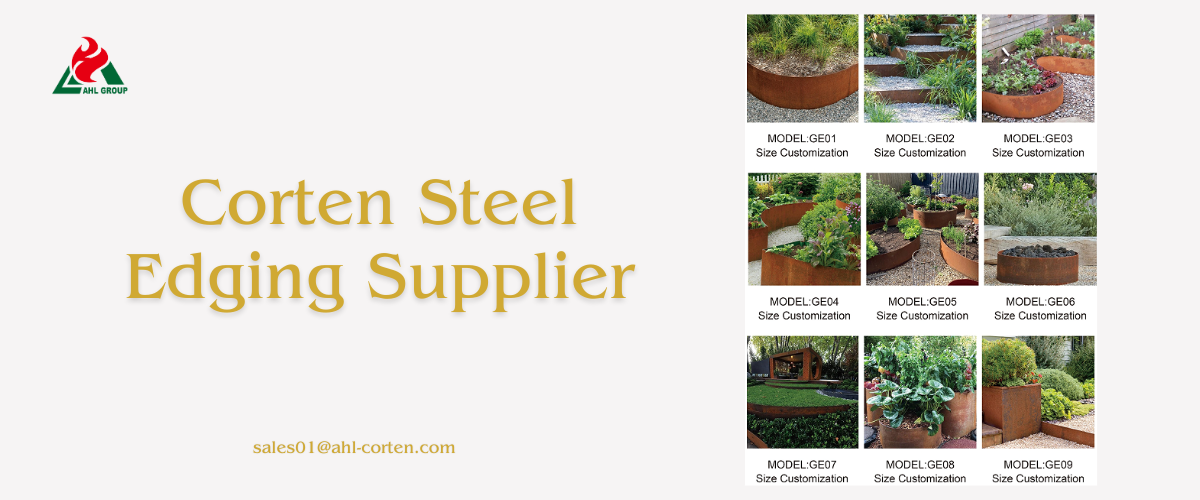
Landscape Edging: Enhancing Curb Appeal and Functionality
As a crucial “hardscape boundary,” landscape edging clearly delineates distinct gardening zones. Beyond elevating street-side aesthetics, edging serves as a structural barrier: it prevents invasive herbaceous plants from spreading laterally via rhizomes while securing inorganic mulches like volcanic rock and crushed granite. By creating permanent “V-shaped trenches,” they also simplify edge trimming maintenance, ensuring gardens maintain structural integrity throughout the growing season.
Why Safety Matters: Preventing Utility Damage and Personal Injury
In professional landscaping, safety is not optional advice—it is your shield against legal liability. Every year, thousands of residential excavation projects narrowly avoid accidents due to severed electrical conduits or punctured irrigation mains. Furthermore, the physical labor of trenching places significant strain on the musculoskeletal system. Prioritizing safety not only safeguards your physical well-being but also prevents substantial financial losses from emergency utility repairs and medical expenses.
Tip 1: Prioritize Underground Utility Mapping & Sub-Surface Awareness
“Call Before You Dig” Rule (811/Local Hotline)
The primary principle for any excavation project is to identify underground utilities. In the United States, calling 811 is a mandatory preliminary step. This service coordinates with local utility providers to mark the location of underground infrastructure. To ensure professional-grade construction results, allow at least three full business days for marking to be completed. Even when using “trenchless” border systems, their 10-inch anchor spikes can easily puncture shallow-buried communication lines, causing service disruptions and potentially resulting in substantial fines.
Identifying Utility Line Color Codes and Shallow Excavation Risks
Mastering the American Public Works Association (APWA) color coding is critical for safe construction:
► Red: Electrical lines and lighting cables.
► Yellow: Gas, oil, steam, or gas transmission pipelines.
► Orange: Communication, alarm, or signal lines.
► Blue: Drinking water pipelines.
► Green: Sewer and drainage lines.
► White: Designated excavation boundary lines.
Expert Warning: The “hand-dig zone” extends 18 to 24 inches on either side of marked lines. Power tools must be completely avoided in this area to prevent catastrophic contact with primary utility lines.
Tip 2: Select High-Spec Personal Protective Equipment (PPE)
Protect Against Sharp Edges and Debris (Cut-Resistant Gloves, Safety Goggles)
When handling galvanized steel, aluminum, or even heavy-duty composite frames, ordinary cotton gardening gloves offer no protection. Opt for cut-resistant gloves meeting ANSI Level 4 or 5 standards. These feature nitrile or latex coatings for enhanced grip and high-strength linings that block metal burrs from piercing the skin. Additionally, ANSI Z87.1 high-impact safety goggles are essential. Whether operating an electric edger that can throw stones or driving stakes with a wooden mallet, goggles serve as the primary defense against permanent eye injury.
Foot Protection and Ergonomic Considerations
Footwear should consist of steel-toe or composite-toe work boots with deep-tread soles. Wearing thin-soled athletic shoes while repeatedly kicking shovels or edgers into compacted soil may cause stress fractures or severe contusions. Additionally, consider the ergonomics of trenching: Maintain a straight back and use leg muscles to push tools into the ground to reduce the risk of lower back strain—a common injury in DIY landscaping projects.
Tip 3: Material-Specific Handling and Cutting Safety
Steel and Aluminum: Handling Sharp Burrs and Using Protective Covers
Metal edging delivers the cleanest profile but poses the highest risk of cuts.
► Deburring Procedure: After cutting metal components with a hacksaw or angle grinder, the edges become extremely sharp. Thoroughly remove all “rough edges” and burrs using a flat file.
► Bending Safety: When bending metal, ensure components are securely clamped to prevent “springback”—where metal suddenly snaps back toward the installer.
► Safety Covers: In family-friendly landscapes, install vinyl safety caps or “T-caps” over exposed top edges to protect children and pets from thin metal edges.
Plastics and Composite Materials: Preventing Breakage and Cracking During Installation
Low-density polyethylene (LDPE) and recycled plastic composites exhibit unique failure points.
► Temperature Sensitivity: Plastics become brittle in cold environments. Striking frozen plastic posts may cause them to shatter into sharp fragments. Always preheat materials in sunlight or a heated garage before installation.
► Safe Cutting Techniques: Use ratchet pipe wrenches instead of utility knives. Utility knives require excessive pressure to cut thick plastic, significantly increasing the risk of “slipping cuts.”
Tip 4: Strategic Depth to Prevent Tripping and Equipment Damage
Minimizing Trip Hazards: The “Flush Installation” Strategy
Improperly installed garden edging creates permanent hazards. To minimize trip risks, boundary materials should protrude only 1/2 to 1 inch above soil or mulch after installation. Excessive protrusion may snag shoe toes or cause ankle sprains. In high-traffic areas adjacent to walkways, “flush installation” is recommended, where the edging sits level with surrounding hardscaping.
Lawnmower Collision Prevention Installation
One of the most dangerous accidents in lawn maintenance involves lawnmower impacts. If a mower blade strikes a metal edging, it can transform the steel into a lethal projectile traveling over 100 mph.
► Depth Calculation: Measure the lowest chassis height of the mower. The curb installation depth must be at least 1/2 inch (approximately 1.3 cm) below this measurement.
► Mowing Strip Design: Professional designs often incorporate a “mowing strip” made of bricks or pavers alongside the curb. This allows mower tires to travel on a stable base, ensuring blades never contact the curb material.
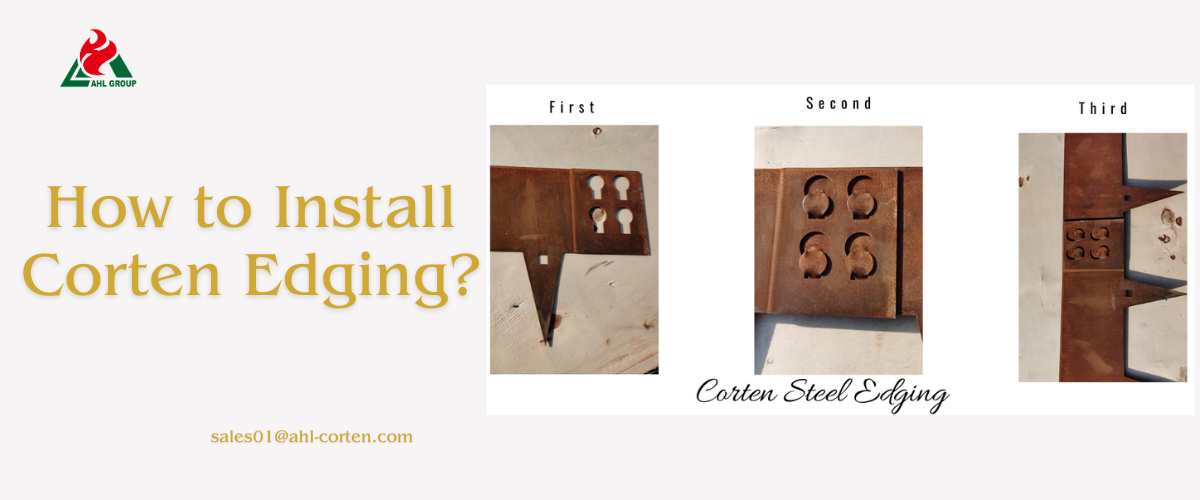
Tip 5: Secure Anchoring to Prevent "Frost Heave" and Exposure
Manage Soil Thaw-Freeze Cycles and Inspect Loose Anchors
In freezing climates, frost heave may physically push edging out of the ground. As soil freezes and expands, upward pressure is exerted on Corten edging and its anchors. If improperly secured, these posts may be lifted several inches, posing safety hazards to pedestrians and vehicle tires.
► Professional anchoring method: Use 12-inch spiral or serrated wooden stakes driven at a 45-degree angle toward the flower bed. This “diagonal staking” technique effectively resists upward soil pressure.
► Maintenance Inspection: Conduct a “Spring Safety Inspection.” After thawing each year, inspect the perimeter and use a shock hammer to re-secure any lifted stakes. Immediately replace bent or rusted stakes to maintain structural integrity.
Conclusion: Mastering the Essentials of Landscape Border Safety
The definition of professional landscaping lies not only in its aesthetic appeal but also in its safety. By adhering to utility marking regulations, equipping yourself with high-grade personal protective gear, and mastering the engineering requirements of your chosen materials, you will ensure the creation of durable and secure borders. Today's safe installation lays the foundation for years of worry-free enjoyment of your outdoor space.
Frequently Asked Questions About Corten Edging
Q: 1. How Deep Should Landscape Edging Be Buried for Maximum Safety?
For most residential applications, borders should be buried 4 to 6 inches (approximately 10-15 cm) deep, with only 1/2 to 1 inch (approximately 1.3-2.5 cm) exposed above ground. This depth provides sufficient structural stability to withstand frost heave while keeping the top edge low enough to minimize tripping hazards and lawnmower blade collisions.
Q: 2. Are Metal Landscape Edging Systems Hazardous to Pets and Children?
Metal edging (steel or aluminum) may pose safety risks if installed too high or with exposed edges. To create a pet-friendly garden, always grind sharp burrs after cutting and use rounded edging or vinyl safety caps. Ensuring the edging sits flush with the ground significantly reduces the risk of pets cutting their paws or ankles.
Q: 3. Do I Really Need to Call 811 for Shallow Boundary Trenching?
Yes. Many telecom and irrigation pipes are buried at depths of just 3 to 12 inches (approximately 7.6 to 30 cm). Even a standard garden spade can easily sever fiber optic cables or puncture PVC water pipes. Calling 811 is a free service that protects you from costly repair liabilities and potential electric shock hazards.
Q: 4. How Can I Prevent Landscape Edging Posts from Loosening or Popping Up?
Soil freeze-thaw cycles can cause posts to “pop up.” To eliminate this safety hazard, use 10-12-inch serrated or spiral posts driven at a 45-degree angle toward the flower bed side (away from the lawn). This mechanical anchoring structure effectively resists upward surface pressure.
